Tuesday, November 28, 2006

My Thanksgiving

I had the pleasure of spending Thanksgiving this year not in the cold climate of Wisconsin or Michigan but instead in bright and sunny Florida! With their temperatures in the 50's - same as here. Yay. Anyway my sister had moved there back in March and my family went down to visit her. We were also celebrating my dad's 60th birthday. We actually had our Thanksgiving dinner on Wednesday and then spent the day at Epcot in Walt Disney World. on Thursday. Dinner was good and Epcot was a blast My favorite thing was the World Showcase, specifically Norway, Germany, and the United Kingdom. Even did a little shopping and picked up some new cookbooks. They are Norwegian Touches: History, Recipes, Folk Arts Notably Norwegian;Germany's Regional Recipes;and German Cookery: The Crown Classic Cookbook Series (Crown Classic Cookbook).The Norwegian cookbook appealed to me because a lot of the recipes were about cookies and other baked goods. The other selling point is each recipe is introduced by a short paragraph on who submitted the recipe and a little background on the recipe itself. It may discuss a particular tradition or what the recipe means to that person. I picked up the two German cookbooks because I like the recipes. Most of my ancestors were German and I would like to try cooking some of the recipes as they should be made and not reinterpreted for the American public (stollen comes to mind as an example of this trend). It would also be interesting to see how some of my family's recipes differ from the recipes in these books. Plus I like books so they made nice souvenirs.

But unfortunately all this fun has been followed by a downside. Somewhere along the way I picked up a cold. There's probably a connection between my cold and hurtling through the air in a metal tube filled with kids of various ages for a couple of hours but I'm digressing. So there won't be much cooking and baking for me until I feel better. Especially in the case of recipes. I prefer to try a recipe first and have people taste-test it before I post about it, good or bad. They may pick-up on things I don't and vice versa. Plus anything I taste right now has the subtle hint of the Walgreen's NyQuil knock-off to it.

Wednesday, November 22, 2006

Happy Thanksgiving!

I'm taking a little break for the next couple days while I spend Thanksgiving Day wandering around Epcot. Have a safe and happy Thanksgiving!


This picture was taken in 2002 by Del Merritt while on a golf trip. We were playing Peninsula State Park Golf Course when this picture was taken.

Monday, November 20, 2006

Pistachio & Apricot Muffins, Take Two

Last month I tried a recipe for pistachio & apricot muffins that I didn't like. It was heavy on the flour and the muffins were dry. I liked the combo of pistachios and apricots so I vowed to try again. This past weekend I did.

Rather than go all nuts swapping out ingredients and changing quantities right away, I decided to change the recipe slightly. Instead of superfine sugar, I used honey. I did this to add sweetness but more importantly, moisture. The first batch was very dry and hard to mix together. This batch was still a little sticky but was much easier to fold the ingredients. So here is the changed recipe.

Pistachio & Apricot Muffins
based on the Pistachio & Apricot recipe on page 274 of the 500 Cupcakes: The Only Cupcake Compendium You'll Ever Need by Fergal Connolly.

Makes 16 regular sized muffins

1 1/3 cups (8 oz) dried apricots
4 tbsp. brandy
4 cups (17 oz) self-rising flour
1/2 cup (1 stick) unsalted butter, cut into small cubes
3/4 cup honey
2 eggs
3/4 cup buttermilk
1/4 teas. + a pinch baking soda
1/2 cup (3 1/2 oz) shelled pistachios

Give the apricots a rough chop and soak them in the brandy for about a hour. Preheat the oven to 325° F. Remove the apricots from the brandy and puree them in a food processor until smooth. Some small chunks of apricot is fine. In a medium sized bowl, cut the butter into the flour until it resembles breadcrumbs and then dust with the additional baking soda. In another bowl, beat the eggs slightly to break up the yolks. Add the honey, buttermilk, and the apricots and mix them together. Combine all the ingredients into the bowl with the flour and butter and stir until everything is just combined. Spoon the mixture evenly into baking cups. I use a 1/4 cup ice cream scoop to measure and place the batter in the cups. Bake for 20-25 minutes, checking after about eighteen minutes. These are done when a cake tester or toothpick comes out cleanly.

These turned out better. The muffins rose more while baking and weren't so dense. Still, they are not light and fluffy. You could taste the apricots and honey but it still had a slight flour taste. These were also sweeter than the previous batch. The taste does improve with age. Lorrie mentioned the picture looks like a jalapeno corn muffin and while that definitely doesn't describe the flavor, that observation is spot-on to the feel and texture of this muffin.

But I think I can do better, maybe next time I'll try reducing the flour. Check back after the holiday season for the next episode of what is now becoming a regular series, Pistachio & Apricot Muffins.

Also, I know the name is Cookies, Et Cetera so you'd think there would be more cookies on this site. Well, all I can say is they're coming. I may have been focusing on the 'et cetera' part for a little bit but in December I will definitely be baking more cookie recipes and sharing them here.

Peppermint Bark

Every year around this time the number of catalogs in my mailbox explodes. Catalogs for fruit, nuts, paper, teddy bears, flowers, you name it, they have a catalog and they will send it to you for free. I even received a catalog this year for English muffins. English muffins! After checking out all of the things they have to offer, I am always amazed at the prices of everything knowing that people order out of these catalogs all the time. If they didn’t, there wouldn’t be a catalog dedicated to English muffins. I understand that. But still many of the things they offer for $25-$30 plus shipping and handling are easy to make and giving something homemade instead of out of a catalog just makes the gift that much more special.

Peppermint bark is one of those things. There are tons of different variations of peppermint bark. Most center on crushed peppermint candies in white chocolate or white candy coating. A few more will include peppermint extract. These recipes are good but it doesn't take that much more work to turn this into a treat people will rave about. The peppermint bark I make has two layers of chocolate plus peppermint extract and is topped with crushed candy canes. I like this recipe because of the combination of chocolate and peppermint. Most barks made with white candy coating or white almond bark have vanilla flavoring that you may or may not be able to taste. This recipe balances the peppermint flavor with the chocolate, you will taste both. Also, the dark and white layers plus the crushed candies looks cool and professional. People will think you ordered it from a catalog.

I also like this recipe because it is very easy to change. The bottom layer of chocolate can be anything you want: dark, semisweet, milk, etc. You can add more or less peppermint extract. The crushed peppermint candies can be put in between the layers or swirled in the white chocolate. Flip the dark and white layers or make it in a pan half the size and cut the thicker bark into smaller, bite-size pieces. You can do anything you want to make this recipe your own.

Peppermint Bark

Makes just under 2 lbs of candy

1 lb (16 oz.) chocolate (I use dark)
12 oz. white chocolate
3/4 tsp. peppermint extract
Ten 6-inch candy canes

Bring water to a boil in the bottom of a double boiler. There should be some space between the water and the upper portion of the double boiler. In the meantime, line the bottom of an 11′ by 17′ or similarly sized cookie sheet with sides with aluminum foil or wax paper. Once the water is boiling remove it from the heat and replace the top of the double boiler. Put about 3/4’s of the chocolate in the double boiler first and melt until it is smooth. Add in the rest of the chocolate and 1/2 tsp. of the peppermint extract. Stir until all the chunks have melted. Pour the melted chocolate into the lined cookie sheet and spread so the thickness is just under a quarter of an inch. Let the chocolate sit for a moment so it cools slightly and then place the cookie sheet in the refrigerator for 20 minutes. While the first layer chills, crush the candy canes. I usually start with ten 6-inch candy canes. If this is not enough for coverage, you can always do more. The size of the broken candy canes should be about the size of a pea. Take the bottom layer of chocolate out of the refrigerator so it warms slightly before the second layer is applied. Again boil water in the bottom of the double boiler. Clean out the upper portion of the double boiler with hot water only, no soap, and dry thoroughly. Once the water is boiling, remove it from the heat and put the top of the double boiler back on it. Place 3/4’s of the white chocolate into the double boiler and stir until it is melted. Add the remaining white chocolate and 1/4 tsp. of peppermint extract and stir until smooth. Pour this evenly over the first layer of chocolate. This layer will be thinner than the first. Sprinkle the top with the pieces of crushed candy canes. Again let it sit for ten minutes before placing it in the refrigerator to set. After an hour the bark should be ready to be broken into pieces. Store in an airtight container in a cool place or freeze. Allow it to come to room temperature before serving.

Just a note on crushing the peppermint candies. I place the candy canes in a freezer bag and use a hammer to break them to the size I want. It’s fun to take out your frustrations and beat the bag of candies against the counter top as some sources recommend but I don’t. First, I've found this method doesn’t break the candies evenly and you use more (and waste more) candies. The other issue I have is the broken candies tear even the stronger freezer bags and by the third hit, clouds of powdered peppermint candies are covering the counter top. Using a hammer or meat tenderizer will allow you to control how the candies break and avoid serious clean-up.

As posted at Sugar Savvy.

Thursday, November 16, 2006

Name this thing I made

The holidays are coming up and I am starting to plan what I'm making for gifts. I won't repeat exactly the same stuff as last year, I want to do a few new things. One item I plan on doing is chocolate covered nut clusters. First, I wanted a test batch to play around with. Work out things like how am I going to drop them, onto what, does that fit into the fridge, etc. Things I don't want to figure out the day of while trying to bake a batch of cookies too. Plus I wanted to try out different flavors and textures. I know chocolate and nuts go together but what else could work. Growing up I remember seeing these sea urchin-like things on cookie and candy platters. You know what I'm talking about, the dried chow mein noodles covered in chocolate and dropped in a spiny cluster. After randomly perusing one of my cookbooks, I ran across a recipe for something similar using butterscotch chips and peanut butter. They called them Butterscotch Haystacks. I know peanut butter is popular with the people regularly test my creations (Lorrie's coworkers) so I modified the recipe so the focus was the peanut butter.

???
based on the Butterscotch Haystack Recipe on page 444 of the The King Arthur Flour Cookie Companion: The Essential Cookie Cookbook

Makes about 36 pieces

3/4 cup (4 1/2 oz) butterscotch chips
3/4 cup (7 1/8 oz) smooth peanut butter
4 1/2 cups (7 7/8 oz) dried chow mein noodles (make sure you have ones that are in decent condition)

First place sheets of wax paper on two 9x13 inch cookie sheets or similar low sided pans. Then combine the butterscotch chips and peanut butter in a large saucepan. Place over low heat. You don't need to drag the double boiler out for this if you stir regularly. Once the mixture is smooth and the color is consistent throughout, carefully add the chow mein noodles. Stir until the noodles are fully covered. A gentle hand is needed because the harder you stir, the more snaps and cracks you will hear. Breaking the chow mein noodles is bad. Nobody wants to eat a chunky, bumpy, peanut butter noodle ball. Nobody. Use two spoons to form the noodle pile, for lack of a better term, and place on the wax paper. Pop these into the refrigerator until they're set and then store in an airtight container.

Biting into one of these gave a definite crunch, which I liked. I hate biting into chocolate-coated pretzels rods and oops, no crunch. Stale. A thorough coating prevents this. The peanut butter taste was dominate, but good. The butterscotch made its presence known in the aftertaste and seemed to add a richness to the peanut butter.

Once they were done and packed, it was time to name them. I was still stuck in the Northwoods theme from the muffins so my initial attempt was 'Peanut Butterscotch Beaver Dams'. See how the 'Peanut Butter' and 'Butterscotch' were combined in a little word flow, nice right? But this seemed very long and I wanted a name that didn't take longer to say than it did to actually eat one. Lorrie and I batted around ideas but nothing stuck.

Lorrie took them to work the next day and held a contest: Name This Treat. She gave them some choices and let them vote. So that's what I am going to do here as well.

Here are your choices:

  • Beaver Dams

  • Nutter Dams

  • Candy Dams

  • Nutter Scotchies

  • Nutter Scotch Pixies

  • Nutter Scotch Haystacks

  • Nutterscotch Stacks

  • Nutter Nests

  • P&L Pullaparts

So vote early and often in the comments. If you have a different suggestion, that's fine too.

I enjoy doing this site

Coming up with ideas for posts and then actually making them is a lot of fun. They say that when you do something you love it shows. I don't know who 'they' are but the sentiment is correct. Somebody did notice. The good people over at the Well Fed Network noticed and offered me a chance to be a contributor on two of their sites: Just Baking and Sugar Savvy. The Well Fed Network is a collection of fifteen food and wine orientated sites dedicated to bringing you high quality articles and ideas you can use.

I will let the sites describe themselves:
Just Baking - Fresh from the oven, we'll be talking about cookies, cakes and breads, and we won’t stop there.
Sugar Savvy - Fabulous content on chocolate, the latest candy bars, gum flavors and much more in the world of sweets.

So come on by, check them out. I should have my first posts up in a short while. I've added links to those sites in the "Sites that inspire me" section on the right side of your screen.

Tuesday, November 14, 2006

Northwoods Bran Muffins

On a typical day my breakfast is a muffin from the cafeteria at work. Nothing too fancy, a bran muffin, maybe a cranberry one. This past Sunday I was paging through my King Arthur Flour Baker's Companioncookbook, looking to see if was anything a little healthier to make when I stumbled on a recipe for raisin bran muffins. This sounded pretty good to me so I made a shopping list and went about my business. Later when I was getting ready to make the muffins I mentioned to Lorrie what I was making and she suggested cranberries instead of raisins (she hates them). I had already planned to modify the recipe so this wasn't a big deal. We called these Northwoods bran muffins because maple syrup and cranberries are two things that the northwoods of Wisconsin are known for.

This post is part of Cate's ARF/5-A-Day Tuesday round-up of recipes that use antioxident rich foods at Sweetnicks.

Northwoods Bran Muffins
based on the Raisin Bran Muffins recipe on page 72 of the The King Arthur Flour Baker's Companion: The All-Purpose Baking Cookbook

Makes 12 regular sized muffins

1 cup milk (I used whole)
1/3 cup (2 3/8 oz) vegetable oil
2 large eggs
3/4 cup maple syrup (from Wisconsin actually)
3/4 cup (1 1/2 oz) wheat bran
1/2 cup (1 3/4 oz) old-fashioned rolled oats
1 1/2 teaspoons cinnamon
1/2 teaspoon salt (I used earth salts)
1 1/4 cups (6 1/2 oz) + 1 tablespoon whole wheat flour (I used 100% organic)
1 teaspoon baking powder
1/2 cup (3 oz) dried cranberries

Preheat the oven at 425 degrees Fahrenheit. Combine the milk, oil, eggs, and maple syrup. Add the wheat bran and oats and set aside for about 15 minutes. In another bowl combine the flour, salt, cinnamon, and baking powder; whisk thoroughly. If needed, give the cranberries a rough chop so they are about the same size as raisins. Fold the dry ingredients and the cranberries into the soaking bran and oat mixture. Dish out into muffin cups and bake for about 15 minutes. These are done when a cake tester comes out cleanly.

I like these muffins but I wasn't prepared for the taste when I first tried them. I had the sugary, cakey muffins they sell at work in my mind and these are definitely not that type of muffin. It was the whole wheat taste that threw me. Also these are not sugary. If you want sweeter it would probably be safe to put another 1/4 cup of maple syrup and/or another 1/4 cup or so of cranberries without having to adjust the flour in the recipe. Lorrie brought these to work and a coworker (who was unable to have some of the other sugar-laden creations I sent in for dietary reasons) enjoyed these immensely.

I am also very happy to be sharing my first recipe.


These muffins also appeared at Just Baking.

Thursday, November 09, 2006

Pumpkin Muffins

This past Sunday I tried a second recipe from the latest book in my collection, 500 Cupcakes: The Only Cupcake Compendium You'll Ever Need. I was not thrilled with how the Pistachio & Apricot Muffins turned out and when I needed to make my Halloween cupcakes I went elsewhere for recipes I trusted more. However, I don't want to condemn a book from one bad recipe and other recipes that seemed very different than recipes from other books so I made a batch of cupcakes using a different recipe. I'm glad I did. This time things turned out much better.

Pumpkins are everywhere this time of year so I tried the Halloween Pumpkin Muffins from page 198 of 500 Cupcakes. Unlike the last muffin recipe I tried from this book, the dry ingredients to wet ingredients ratio was more on par with what I expected. A major difference this time was the amount of flour was less than half the Pistachio & Apricot Muffins. Also, no butter. This recipe called for vegetable oil. Flavoring was pumpkin puree, cinnamon, and allspice. I used canned pumpkin and I don't regret it one bit. I made my own fresh pumpkin last year and it was fine and all but a lot more work (I roasted) for results that were a little better. Not to say I wouldn't do it again, especially if I was making a soup or something and wanted to use the pumpkin halves as bowls or if I got a really good deal on pumpkin. It's just in my opinion the canned pumpkin is pretty good for something coming in a metal container. But I'm digressing. I combined the dry ingredients and the wet separately and then folded the dry in until they were just mixed.

Now here's where the book got a little screwy. The recipe says this makes 6 large muffins. When I hear large muffins, I think of ones bigger than my fist, six to a pan large. The muffins you get at a coffee shoppe and you need both hands to carry the plate kind of big. The intro caption for this recipe says "Decorate these cupcakes with skeletons for when the trick-or-treaters come calling." I'm reading the recipe thinking, yeah, these trick-or-treaters are going to work themselves into a frenzy when I pop open the door and reward their shy/enthusiastic "Trick-or-treat!" with a frosted muffin the size of their head! But that's not the picture the book gives me to use as a guide. The picture given with the recipe shows what I consider a standard size, twelve to a pan size. Reality is there is enough batter to make six large or twelve regular muffins but still a little weird. These really were good looking muffins coming out of the oven. The book has these cupcakes with cut-out fondant but I didn't want to do that, I was planning on using a cream cheese frosting. I didn't have a chance to make a homemade frosting for these so I just used one of the store bought whipped varieties. To top them off, little candy sprinkles shaped and colored like autumn leaves.

I liked these muffins. They were moist and tasted wonderful. The cream cheese frosting was a good choice flavorwise. The pumpkin flavor of the muffin was strong and matched well with the frosting. The candy sprinkles not only added color but a little crunch too when you bit into them. I know these went fast when Lorrie took them to work. I would definitely recommend this recipe.

OK, 500 Cupcakesis now one for two as far as the recipes are concerned. I want to try one or two more before I post of review of the book. I'm hoping the other recipes turn out like this.

Monday, November 06, 2006

Halloween Cupcakes

For Halloween this year, Lorrie and I had decided to do some kind of baking project. We thought about mailing cookies to some friends and what-not and that was the plan when I left to do the shopping. I was walking through Bev's World looking at the chocolate molds and inspiration struck. I grabbed a couple of the Halloween molds that would be perfect for decorations on the top of...cupcakes! Cupcakes are not things I tried before and I thought this would be a great time to try. I thought I could do some vanilla cupcakes and some chocolate. Instead of frosting, we would roll fondant and use a circle cutter and then put the little chocolates on top. So I picked up the necessary supplies and went home to convince Lorrie that this was the way to go. Eventually, she agreed.

First thing I had to do was make the little chocolate bits to put on top of the fondant. I picked up three molds: one mold that were half inch by one inch and said 'BOO' and two molds that had little half inch square cats, witches, ghosts, jack o' lanterns, bats, and skulls. This wasn't that hard. The candy meltsI was using melted easily in squeeze bottles after a couple quick zaps in the microwave. The squeeze bottles let you control how much and where you put the candy so I also reduced the need for scraping. I didn't need the backs to be completely smooth. In fact, I made a point on the backs so it would stick into the fondant and hold its place a little better. The standard color for skulls and ghosts was white, the color for jack o' lanterns and witches (I know weird but it balanced out the number of candies) was orange, and the color for cats and bats was black. To get the black candy I added black candy coloring to dark chocolate melts. For the mold with the word 'BOO' I pretty much stuck to orange and white candy melts. The candies set pretty quick in the fridge since the candies were small and thin. I did try 'painting' the molds a little more this time. With a toothpick and the black candy melts I added eyes to some of the jack o' lanterns and the ghosts and did hats on some of the witches. Still not near perfect, beautifully painted candies but I am slowly getting better at it.

For the cupcakes I chose two recipes from a cookbook I ordered a couple of weeks ago, The King Arthur Flour Baker's Companion: The All-Purpose Baking Cookbook. I like the other King Arthur book I have and it hasn't let me down so I believed these recipes would work. For the plain or vanilla cupcakes I chose the Classic Yellow Cake recipe on page 352. One batch of this recipe yields twenty-four cupcakes. I made two batches of this recipe so we could pick the best ones to use. The first batch didn't rise as much as the second batch but that isn't saying much. These cupcakes didn't rise much beyond the cups I put them in. They tasted good and to me that's the most important thing. The flatness and uniformity of these cupcakes lent themselves to using the fondant but then again maybe I'm just trying to find the positive of their appearance. In any case, they tasted good and looked fine decorated and I'd definitely use this recipe if I needed to do cake rounds for decorating. For the chocolate cupcakes I used the Devil's Food Cake recipe on page 351. This is my favorite of the two cupcake recipes I made. These rose much more in the cups and I probably overfilled them a little but I like the extra top. The flavor was good, a nice chocolate that hung around a little in the aftertaste. I also made two batches of these. Yes, two batches. For those of you not counting along at home, that's ninety-six waiting to be decorated.

Well, not exactly. Like I said we picked through and got rid of ones that didn't look right and so forth. Mainly it was excluding a lot of the first batch of the yellow cake ones but there were a couple of devil's food cake ones that were rejected. Having chosen the best ones, we set about decorating them. The idea was to have two colors, orange and purple, for the cupcakes. These seem to be predominate Halloween colors when we were looking at Halloween decorating ideas. I purchased white fondant and colored it myself. This sounds like it's going to be much more complicated than it really was. The toughest part? The actual mixing of the color into the fondant. The fondant I purchased was in two-and-a-half pound blocks. I worked about a quarter of a block at a time. It has the consistency of clay so working in the coloring was a lot of folding and stretching and recombining until the color was uniform. I alternated between doing orange and doing purple and I didn't really have any issues being consistent in the coloring. All the orange looked the same and all the purple looked the same. I would roll a little out, cut out the circles, and pass them to Lorrie. She secured them to the cupcakes by first brushing the cupcakes with a light coat of corn syrup. Once dry, the corn syrup held the fondant firmly in place. Rolling out the fondant is much like rolling out dough for cutout cookies, you need a well-floured surface and rolling pin but in this case, that flour is actually powered sugar.

Once all the cupcakes had the fondant layer, I gave them a dusting of pearl dust and then placed the candies. Pearl dustis used to give fondant a little shine or sparkle. Using the pearl dust took a little getting used to. A little goes a long way as I learned the hard way. My first couple cupcakes or so had a lot on them and they took a definite silver tinge to them. As with all of these new things I was trying I became better as I went. After all the cupcakes had a coating of pearl dust, Lorrie and I arranged the candies on top. It came out to be three different pieces per cupcake, usually one of each color though there was some variation. After laying out all of the candy on top, I put them in place with a light dab of corn syrup.


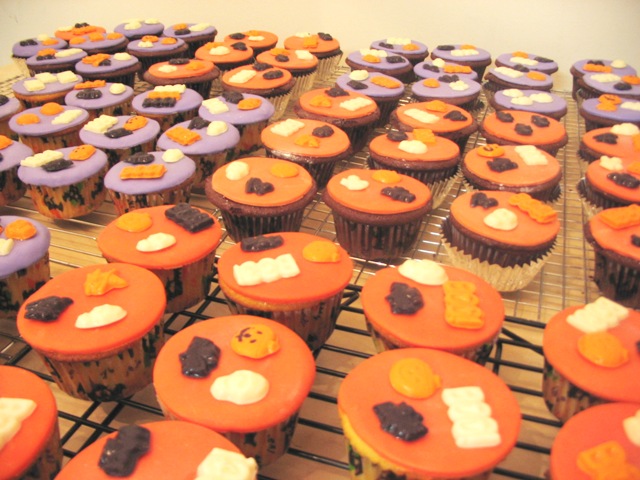
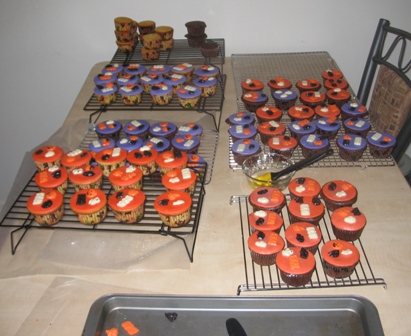
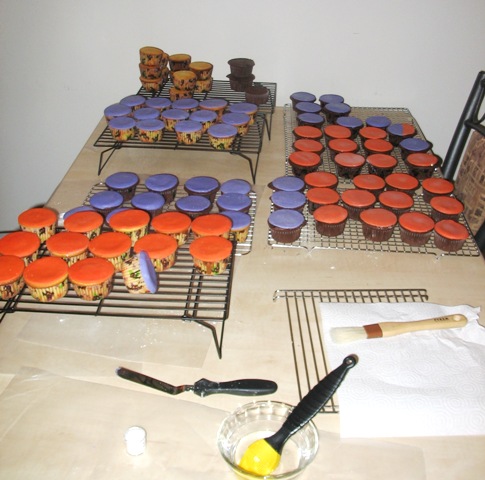
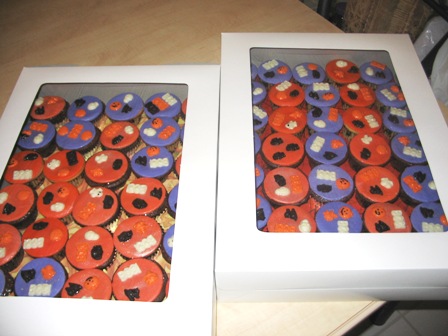
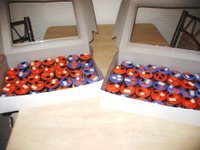
We had some baker's boxes to put them in and lined the bottoms with Halloween themed paper from the scrapbooking section of Michaels. The cupcake liners were Halloween themed until I blew past the seventy-two cupcake mark and then I used some plain ones that had a second aluminum cup (they are actually meant to be baked without a muffin pan, you just put these on a cookie sheet). Lorrie and I each took a box to work the Monday before Halloween.


End result? They looked good and tasted even better. The fondant tasted better the next day. I have to admit I thought it was a little chewing gumish when I first tried it plain but when I had a cupcake the next day it was good. The finished product reminded me a little of a Hostess cupcake in look and feel when I bit into one, but better tasting. I do think this would be a good way of doing a creme filled cupcake, sometime in the future.

Thursday, November 02, 2006

What the heck are these?

I'm supposed to be working on my post about what we did for Halloween but its rather large so its taking a while. In the meantime, here's a quick post I've been meaning to do.


A while back I was at a rummage sale where the couple were literally selling everything and I bought a box of cookie cutters. I didn't have a good number of them and they were in really good condition. But in with all of them were two that I couldn't identify what they were supposed to be. We have some guesses: weird bat, corn, lamb's face. Nothing for sure. So I'm putting this out there. What are these two cutters? I have them shown two ways in hope somebody can identify them. They appear to be part of a Easter/spring set or possibly just from the same manufacturer. Here is a group shot.


Any help would be appreciated. Thanks.