Showing posts with label chocolate. Show all posts

Thursday, May 31, 2007

I want candy (for other reasons)

I have to admit, I feel a little out of place at Sugar Savvy. I mean, I like candy. Yeah, my Halloween candy lasted until Easter and my Easter candy lasted until Halloween, but really, I like candy. It seems to me to be review, review, Hey - I made brittle, review, review. And by no means am I trying to demean what they are doing. I know they enjoy eating and writing about sweets as much as I do, they’re probably even better at the writing part of it too. But in my little world, I just have a different view of candy. When I see a piece of candy, my first thought isn’t so much about taste, but can I use this in something. To me, more often than not, I think of candy as a part of a larger piece.

Take these marshmallow ice cream cones for example.


When I saw these I wasn’t thinking about a slightly stale marshmallow taste with a sugar crust reminiscent of Peeps. I was trying to figure the best way to work them into a home-baked gift, which turned into this:


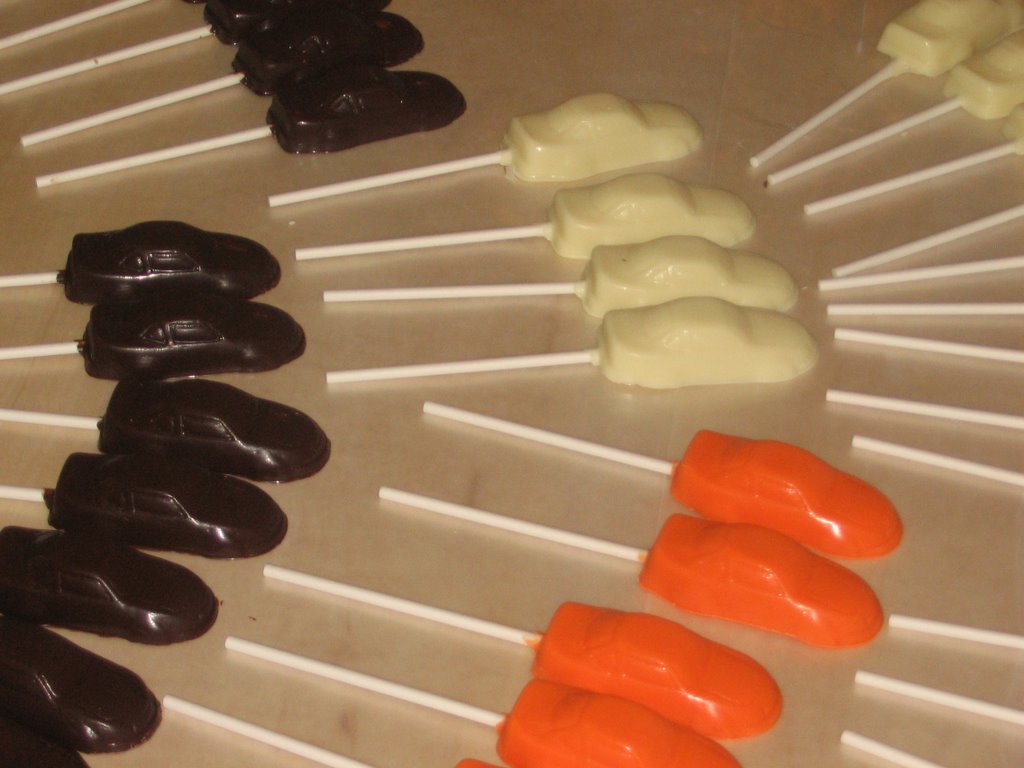
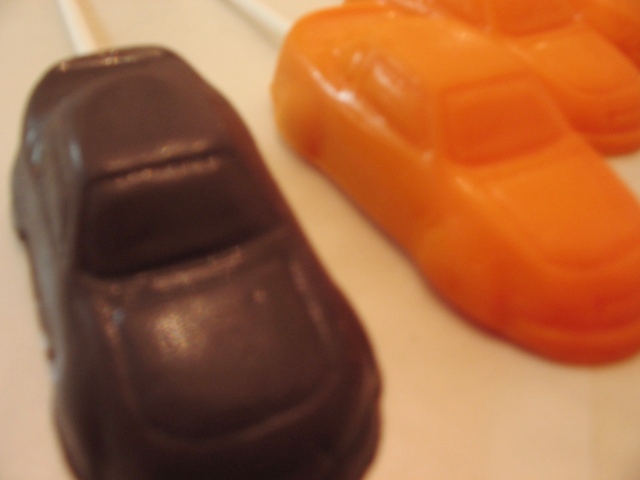
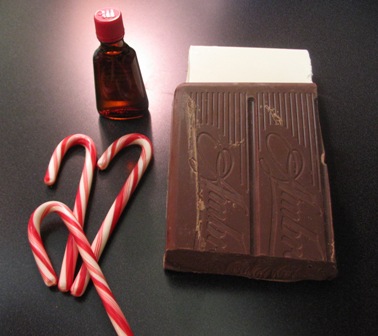
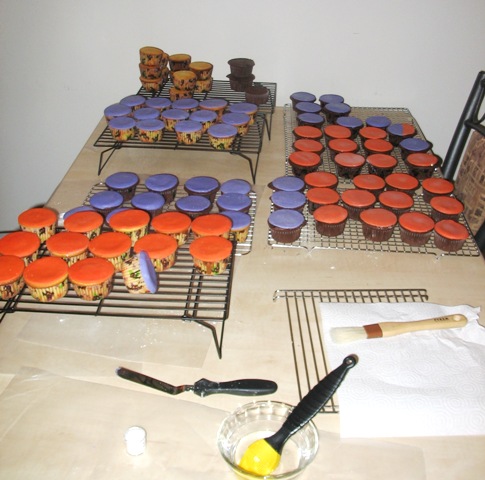
One of my favorite things to use is chocolate.  I've used molded chocolate (and it’s cheaper and easier-to-use cousin candy melts) for a number of projects. It’s so simple to do. Cars, bats, skulls, and hearts are just some of the things I've made to adorn or accompany my baked goods. First, you need a mold. I was lucky starting out, there was a baking and candy making supply store near me with large selection of chocolate molds. Sadly, well for me anyway, it closed recently. Hobby stores and party supply stores also have molds; however they tend to have a small selection of just the basics. With a little planning though, you can find anything you need online. The next step is to melt the chocolate. Then pour into the mold. Scrap off the excess, refrigerate until hard, and unmold. You now have your own crafted candies.


Marshmallow cone picture from the Marshmallow Cone Company Website


Also appearing at Sugar Savvy and featured on the Well Fed Network.


Follow-Up
I received this email a couple days ago:

I just happened to come across your blog today when I was doing a search for “marshmallow cones.”

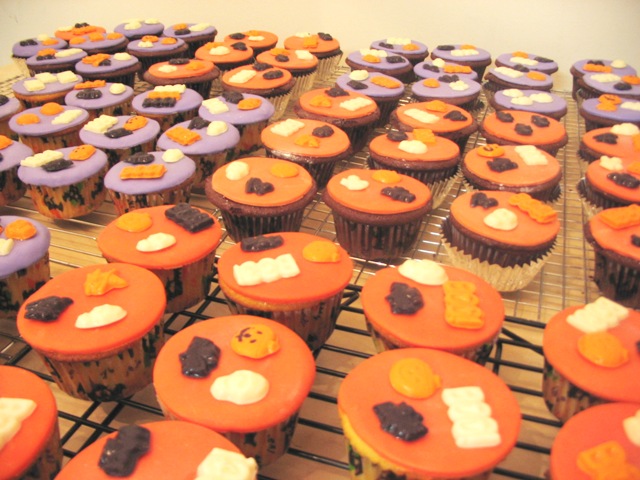
Not that it’s here or there, but under your May 31st entry, you show a picture of our marshmallow cones and then your cupcakes have a tiny marshmallow cone on them.

The first picture is from our website (I took and edited it myself), the latter one is a foreign-made “marshmallow” cone.

There’s a big difference between our product and theirs – ours is 4” long, theirs is 1.5 or 2” long. Ours has a marshmallow topping, theirs is more like a sugar-crusted jelly bean.

FWIW, given your penchant for cooking/baking/decorating you might be interested in knowing that some people use our cones in building gingerbread houses. One woman sent me pictures where they had used the cones as front door pillars.

Anyway, I saw your blog and just thought I’d write.

Take care,
Dan

Dan Runk
President
Marshmallow Cone Company
www.marshmallowcone.com
"Celebrating 71 Years (1936-2007)"


I have to admit I wasn't entirely sure the cones I used were his brand. Lorrie purchased them from a candy store chain and I tried to find the source the best I could since there was no box. I tried to match up the look and style of the cones to pictures on the 'Net and I thought I had. Obviously, this is not the case and I apologize for any inconvenience this may have caused.

Saturday, December 23, 2006

A little something for Christmas

I entered December with the start of a plan. I envisioned two weekends where I would be able to bake cookies like pfeffernusse, try my hand at lebkuchen, maybe tackle a mincemeat pie. But the plan changed, neither weekend could be used. Weekday nights are tough because by the time I get home from work and get ready, it's already well into the evening.

Still, I wanted to do something. This led to two late nights of making nut clusters, barks, and dipping. I was able to do this by using chocolate flavored and vanilla flavored almond bark. Made to be melted and dipping, almond bark (sometimes referred to as candy coating) works well as a time saving and cost saving alternative to real chocolate. Especially for dipping, where the most important flavor is the item dipped and not what it's dipped in. Plus, a few people in my family don't eat chocolate but they can still have the vanilla version. Time is saved because there is no tempering, just melt and go. Need more? Just add it and melt. Much, much simpler and no worrying about bloom. Qualitywise, let's be honest and say this isn't going to wow any chocolatiers or chocolate sophisticates who sample hand-rolled truffles infused with basil and topped with sea salt. Really, the quality is on par with a chocolate bar from Hershey's or Nestle and most people will appreciate the effort you put into making it.

All in all, I was able to make a selection of items for small gifts. Lorrie and I both brought some to work. A little bag to a friend here and there. Enough to bring with use to both family Christmas celebrations. Below is a list of things I made.

  • Cherry vanilla bark
  • Vanilla-covered and chocolate-covered toasted coconut marshmallows
  • Vanilla-covered and chocolate-covered shortbread
  • Chocolate-covered Nutter Butters
  • Mint chocolate-covered graham crackers
  • Mint-covered Oreos
  • Vanilla-covered Oreos with crushed peppermint candy canes
  • Vanilla-covered peanut butter and Ritz cracker sandwiches
  • Cranberry and pistachio vanilla mendiants
  • Various chocolate-covered nut clusters
  • Vanilla almond bark
  • Peanut clusters, Almond clusters, and mixed nut clusters

I wish I had the time to bake though. I was looking forward to having some fun trying recipes though now I won't feel guilty about showing up empty-handed.

Tuesday, December 05, 2006

Chocolate Covered Espresso Cookies

I'm always scanning the other food blogs looking for something I think Lorrie will like. I saw these espresso cookies from alpineberry and I knew I had to make them for her. After finding them a month ago, I finally had the opportunity to make these last night and tonight. They were great. The original recipe was strong in the coffee flavor but not sweet. In my opinion they were more like a digestive biscuit from the UK than what Americans traditionally think a cookie is. That sounds worse than it is, it just means they are not sweet. I actually dislike super sweet and sugary and I found these very tasty right out of the oven. But a slight modification and use of the double boiler will up the sweetness level against the coffee flavor. I think I like these better than chocolate covered Oreos or Nutter Butters. These should be very popular when she brings them to work tomorrow!

I changed the recipe slightly. Dark brown sugar instead of light brown sugar gives them a little more sweetness and a darker color. I used white chocolate and added the ground espresso beans to the chocolate to give it a little grit, a little coffee flavor, and a speckled effect.


Chocolate Covered Espresso Cookies
(modified version of the ones Mary at alpineberry made which she adapted from Fine Cooking)

Makes about 28 cookies

4 ounces (1 stick) unsalted butter at room temperature
1/3 cup lightly packed dark brown sugar
1 tsp instant espresso powder
2 tsp water
2 tsp finely ground espresso beans
1 1/4 cups all purpose flour
1/8 tsp salt
enough white chocolate to cover 28 cookies

Dissolve the instant espresso powder in the water. Cream the butter and dark brown sugar together. Once it's well blended, add in the water and dissolved instant espresso powder and mix well. Finally add in the rest of the ingredients minus 1 tsp of the espresso beans until they are just mixed. Roll the dough into a log and then wrap in plastic wrap. Use the plastic wrap to form the dough into the log, it will be more consistent. The dough log should be about seven inches. Put in the refrigerator overnight and no more than a couple of days. Preheat the oven to 350° F. Cut the cookies from the dough, about 1/4 inch thick. Place on cookie sheet and bake for about 12-15 minutes. The cookies are done when the sides are brown and the cookies appear dry. Cool on a rack for about an hour. Melt the chocolate and add in the 1 tsp of the espresso beans. Dip the cookies, covering them with a thin layer of the chocolate. Place on wax paper and allow 10 minutes to set and then place in the refrigerator for another 10 minutes. Store in an airtight container in a cool place.

I'd like to say I made these in conjunction with the National Cookie Day but I didn't know yesterday was that until I saw a post about it on Cooking Is Medicine. Probably should have been more on top of that. By the way, it is also National Cookie Cutter Week so celebrate by helping me determine what these are!

Saturday, December 02, 2006

And the winner is...

A few weeks back I asked for your help to Name this thing I made. Well the votes are tallied and the winner is: Nutter Scotch Haystacks!

Thanks to all those who voted and commented!

Also, I've noticed that there are a good number of people looking for recipes using chow mein noodles. Using this as a base, I have a couple of variations you can try.
  • Replace the butterscotch chips with peanut butter chips and then drizzle with melted chocolate or top with marshmallows.
  • Replace the butterscotch chips and peanut butter with 1-1/2 cups of chocolate chips and 2/3 cup of coconut.

Monday, November 20, 2006

Peppermint Bark

Every year around this time the number of catalogs in my mailbox explodes. Catalogs for fruit, nuts, paper, teddy bears, flowers, you name it, they have a catalog and they will send it to you for free. I even received a catalog this year for English muffins. English muffins! After checking out all of the things they have to offer, I am always amazed at the prices of everything knowing that people order out of these catalogs all the time. If they didn’t, there wouldn’t be a catalog dedicated to English muffins. I understand that. But still many of the things they offer for $25-$30 plus shipping and handling are easy to make and giving something homemade instead of out of a catalog just makes the gift that much more special.

Peppermint bark is one of those things. There are tons of different variations of peppermint bark. Most center on crushed peppermint candies in white chocolate or white candy coating. A few more will include peppermint extract. These recipes are good but it doesn't take that much more work to turn this into a treat people will rave about. The peppermint bark I make has two layers of chocolate plus peppermint extract and is topped with crushed candy canes. I like this recipe because of the combination of chocolate and peppermint. Most barks made with white candy coating or white almond bark have vanilla flavoring that you may or may not be able to taste. This recipe balances the peppermint flavor with the chocolate, you will taste both. Also, the dark and white layers plus the crushed candies looks cool and professional. People will think you ordered it from a catalog.

I also like this recipe because it is very easy to change. The bottom layer of chocolate can be anything you want: dark, semisweet, milk, etc. You can add more or less peppermint extract. The crushed peppermint candies can be put in between the layers or swirled in the white chocolate. Flip the dark and white layers or make it in a pan half the size and cut the thicker bark into smaller, bite-size pieces. You can do anything you want to make this recipe your own.

Peppermint Bark

Makes just under 2 lbs of candy

1 lb (16 oz.) chocolate (I use dark)
12 oz. white chocolate
3/4 tsp. peppermint extract
Ten 6-inch candy canes

Bring water to a boil in the bottom of a double boiler. There should be some space between the water and the upper portion of the double boiler. In the meantime, line the bottom of an 11′ by 17′ or similarly sized cookie sheet with sides with aluminum foil or wax paper. Once the water is boiling remove it from the heat and replace the top of the double boiler. Put about 3/4’s of the chocolate in the double boiler first and melt until it is smooth. Add in the rest of the chocolate and 1/2 tsp. of the peppermint extract. Stir until all the chunks have melted. Pour the melted chocolate into the lined cookie sheet and spread so the thickness is just under a quarter of an inch. Let the chocolate sit for a moment so it cools slightly and then place the cookie sheet in the refrigerator for 20 minutes. While the first layer chills, crush the candy canes. I usually start with ten 6-inch candy canes. If this is not enough for coverage, you can always do more. The size of the broken candy canes should be about the size of a pea. Take the bottom layer of chocolate out of the refrigerator so it warms slightly before the second layer is applied. Again boil water in the bottom of the double boiler. Clean out the upper portion of the double boiler with hot water only, no soap, and dry thoroughly. Once the water is boiling, remove it from the heat and put the top of the double boiler back on it. Place 3/4’s of the white chocolate into the double boiler and stir until it is melted. Add the remaining white chocolate and 1/4 tsp. of peppermint extract and stir until smooth. Pour this evenly over the first layer of chocolate. This layer will be thinner than the first. Sprinkle the top with the pieces of crushed candy canes. Again let it sit for ten minutes before placing it in the refrigerator to set. After an hour the bark should be ready to be broken into pieces. Store in an airtight container in a cool place or freeze. Allow it to come to room temperature before serving.

Just a note on crushing the peppermint candies. I place the candy canes in a freezer bag and use a hammer to break them to the size I want. It’s fun to take out your frustrations and beat the bag of candies against the counter top as some sources recommend but I don’t. First, I've found this method doesn’t break the candies evenly and you use more (and waste more) candies. The other issue I have is the broken candies tear even the stronger freezer bags and by the third hit, clouds of powdered peppermint candies are covering the counter top. Using a hammer or meat tenderizer will allow you to control how the candies break and avoid serious clean-up.

As posted at Sugar Savvy.

Monday, November 06, 2006

Halloween Cupcakes

For Halloween this year, Lorrie and I had decided to do some kind of baking project. We thought about mailing cookies to some friends and what-not and that was the plan when I left to do the shopping. I was walking through Bev's World looking at the chocolate molds and inspiration struck. I grabbed a couple of the Halloween molds that would be perfect for decorations on the top of...cupcakes! Cupcakes are not things I tried before and I thought this would be a great time to try. I thought I could do some vanilla cupcakes and some chocolate. Instead of frosting, we would roll fondant and use a circle cutter and then put the little chocolates on top. So I picked up the necessary supplies and went home to convince Lorrie that this was the way to go. Eventually, she agreed.

First thing I had to do was make the little chocolate bits to put on top of the fondant. I picked up three molds: one mold that were half inch by one inch and said 'BOO' and two molds that had little half inch square cats, witches, ghosts, jack o' lanterns, bats, and skulls. This wasn't that hard. The candy meltsI was using melted easily in squeeze bottles after a couple quick zaps in the microwave. The squeeze bottles let you control how much and where you put the candy so I also reduced the need for scraping. I didn't need the backs to be completely smooth. In fact, I made a point on the backs so it would stick into the fondant and hold its place a little better. The standard color for skulls and ghosts was white, the color for jack o' lanterns and witches (I know weird but it balanced out the number of candies) was orange, and the color for cats and bats was black. To get the black candy I added black candy coloring to dark chocolate melts. For the mold with the word 'BOO' I pretty much stuck to orange and white candy melts. The candies set pretty quick in the fridge since the candies were small and thin. I did try 'painting' the molds a little more this time. With a toothpick and the black candy melts I added eyes to some of the jack o' lanterns and the ghosts and did hats on some of the witches. Still not near perfect, beautifully painted candies but I am slowly getting better at it.

For the cupcakes I chose two recipes from a cookbook I ordered a couple of weeks ago, The King Arthur Flour Baker's Companion: The All-Purpose Baking Cookbook. I like the other King Arthur book I have and it hasn't let me down so I believed these recipes would work. For the plain or vanilla cupcakes I chose the Classic Yellow Cake recipe on page 352. One batch of this recipe yields twenty-four cupcakes. I made two batches of this recipe so we could pick the best ones to use. The first batch didn't rise as much as the second batch but that isn't saying much. These cupcakes didn't rise much beyond the cups I put them in. They tasted good and to me that's the most important thing. The flatness and uniformity of these cupcakes lent themselves to using the fondant but then again maybe I'm just trying to find the positive of their appearance. In any case, they tasted good and looked fine decorated and I'd definitely use this recipe if I needed to do cake rounds for decorating. For the chocolate cupcakes I used the Devil's Food Cake recipe on page 351. This is my favorite of the two cupcake recipes I made. These rose much more in the cups and I probably overfilled them a little but I like the extra top. The flavor was good, a nice chocolate that hung around a little in the aftertaste. I also made two batches of these. Yes, two batches. For those of you not counting along at home, that's ninety-six waiting to be decorated.

Well, not exactly. Like I said we picked through and got rid of ones that didn't look right and so forth. Mainly it was excluding a lot of the first batch of the yellow cake ones but there were a couple of devil's food cake ones that were rejected. Having chosen the best ones, we set about decorating them. The idea was to have two colors, orange and purple, for the cupcakes. These seem to be predominate Halloween colors when we were looking at Halloween decorating ideas. I purchased white fondant and colored it myself. This sounds like it's going to be much more complicated than it really was. The toughest part? The actual mixing of the color into the fondant. The fondant I purchased was in two-and-a-half pound blocks. I worked about a quarter of a block at a time. It has the consistency of clay so working in the coloring was a lot of folding and stretching and recombining until the color was uniform. I alternated between doing orange and doing purple and I didn't really have any issues being consistent in the coloring. All the orange looked the same and all the purple looked the same. I would roll a little out, cut out the circles, and pass them to Lorrie. She secured them to the cupcakes by first brushing the cupcakes with a light coat of corn syrup. Once dry, the corn syrup held the fondant firmly in place. Rolling out the fondant is much like rolling out dough for cutout cookies, you need a well-floured surface and rolling pin but in this case, that flour is actually powered sugar.

Once all the cupcakes had the fondant layer, I gave them a dusting of pearl dust and then placed the candies. Pearl dustis used to give fondant a little shine or sparkle. Using the pearl dust took a little getting used to. A little goes a long way as I learned the hard way. My first couple cupcakes or so had a lot on them and they took a definite silver tinge to them. As with all of these new things I was trying I became better as I went. After all the cupcakes had a coating of pearl dust, Lorrie and I arranged the candies on top. It came out to be three different pieces per cupcake, usually one of each color though there was some variation. After laying out all of the candy on top, I put them in place with a light dab of corn syrup.


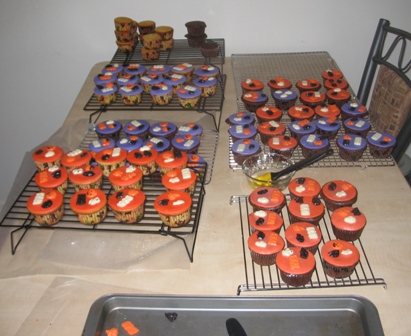
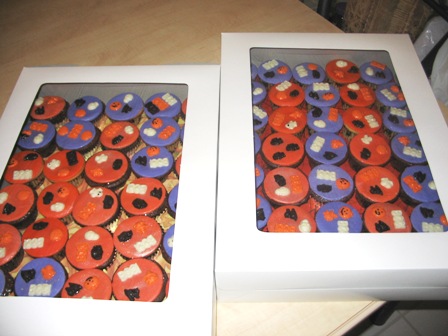
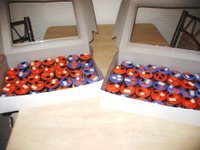
We had some baker's boxes to put them in and lined the bottoms with Halloween themed paper from the scrapbooking section of Michaels. The cupcake liners were Halloween themed until I blew past the seventy-two cupcake mark and then I used some plain ones that had a second aluminum cup (they are actually meant to be baked without a muffin pan, you just put these on a cookie sheet). Lorrie and I each took a box to work the Monday before Halloween.


End result? They looked good and tasted even better. The fondant tasted better the next day. I have to admit I thought it was a little chewing gumish when I first tried it plain but when I had a cupcake the next day it was good. The finished product reminded me a little of a Hostess cupcake in look and feel when I bit into one, but better tasting. I do think this would be a good way of doing a creme filled cupcake, sometime in the future.

Wednesday, October 18, 2006

National Boss Day 2006 - Part One - Chocolate

Monday was National Boss Day. Hurry, it's not too late to get him/her something. OK, maybe it is. Anyway, Lorrie and her coworkers wanted to get their boss a little something so Lorrie and I came up with some different options to create. The theme was NASCAR and her boss' favorite driver, Tony Stewart. This gave us the colors to work with: white, orange, and brown. You may recognize these as the colors of Home Depot, which is the major sponsor of the #20 car Tony drives. So we had the theme and colors, we then decided to do something in chocolate and a couple of cookies.

First, the chocolates. I had done some chocolate work last Christmas and I enjoyed it immensely. I wanted to try something in this area again. So while we're shopping, we found the molds for NASCAR type cars. The molds even included a place for the lollipop stick so we went with that. We grabbed two of them. I had some white candy coating and dark chocolate already so we picked up some of the orange candy coating. The orange was pretty close to the Home Depot orange so it worked out great and I didn't have to worry about color matching. This was pretty simple to do. Melt the chocolate/candy coating, put the stick in the mold, and pour. Since I could only make ten candies at any one time, I didn't bring out the double boiler. I used some ceramic bowls that hold heat well and I could put a handful of the candy discs in at one time. I used the microwave to melt everything but I did it on a low setting and stopping frequently to stir and make sure it wasn't getting too hot. I did screw up once with the white and forgot to decrease the power setting and it didn't burn really but formed brown crystal-like things. I scraped that batch and cleaned everything and started again so it didn't hurt anything. I didn't like the fact the molds alternated which direction the stick went but its possible this mold was not intended for chocolate. I used a small spatula to scrape the molds so it worked fine. I can't say it was hard work either. Melting took a couple of minutes, pouring took about two minutes, waiting about five minutes to scrape the molds and then about an hour in the fridge waiting for them to set. Lorrie and her mother wrapped them in plastic and attached flags to a few. We ended up with about 45 of them. I think they turned out well.

Thursday, October 12, 2006

English Toffee

Cooking For Engineer's has a English Toffee recipe I wanted to try. I plan on doing more with toffee plus other candies and brittles around Christmas so I wanted to experiment a little bit. This is the second time I've made a candy this week so I figure it was good practice and more reinforcement on how the whole candy making process works. I varied a little bit from the recipe. OK, I forgot to add the salt but I still thought it turned out pretty good. The chocolate layer is a tad thin as well but I was eyeballing it, I probably should have measured out the chips. Also their method uses a silicon mat or says to use wax paper, I used aluminum foil which worked just fine. The picture on the right is my batch, the one on the left is from the Cooking For Engineer's site.