Showing posts with label Not My Recipes I Just Did The Work. Show all posts

Wednesday, March 26, 2008

Pistachio Ice Cream


I must say I was a little surprised to get this for my birthday. I've always wanted one but it really is such a want versus a need that I could never convince the miser in me to buy one. I would see the posts on other's blogs about the various sorbets and gelatos and ice creams and then I'd float over to Amazon to view the various options but that's where the fantasy ended. Or so I thought. Lorrie knew I wanted one and it isn't beyond reason that she would get me one. It's just she had been talking that my birthday gift was going to be a tattoo...for her. She wanted to get a tattoo similar to the raven on my shoulder. I thought that would be a pretty nice gift too.

Just as soon as the freezer bowl found a home among the frozen fish fillets and bags of icy fruit, I hit the cookbooks for recipes. I didn't need to go any further than the included recipe pamphlet to find what I needed to fulfill my promise to Lorrie: pistachio ice cream. Very simple to make and very easy to eat! This was so creamy, coat-your-tongue creamy. Just look at the ingredients and you can see why - three cups of heavy cream. Wonderful flavor and I was a bit surprised by that. When I added the extracts (and I didn't measure exactly like it asked but pretty close) I thought the flavors where a bit strong to taste. My concerns of this having the extract-y taste were for naught. Once frozen and mixed with the nuts, the vanilla and almond flavors were mild and only highlighted the pistachios.

Speaking of the pistachios, I couldn't find any unsalted or lightly salted. So I went ahead with the full salt ones anyway. It ultimately added a slight taste of salt, which I think made it better. I think the bigger issue was it lowered the freezing point of the cream mixture and it never really froze hard. I'm not sure I would use unsalted pistachios if I had access to them because Lorrie and I absolutely loved this ice cream as it was and I'm not sure unsalted pistachios would improve the flavor.

Before I started making anything, I consulted Kate Zuckerman's book The Sweet Life: Desserts from Chanterelle. Chapter six is called Ice Creams, Sorbets, and Frozen Desserts, and she starts this chapter with guidelines for making frozen desserts. Kate gives an introduction to the science behind ice cream making and then relates her experiences making ice cream in restaurant kitchens and at home. The key is controlling ice crystal formation and she explains how the ingredients, preparation, and even the machines can affect your end product.

Pistachio Ice Cream
from page 5 of the Cuisinart Pure Indulgence Ice Cream Maker Recipe Booklet

Makes about 2 quarts or so

1 1/3 cups whole milk, well chilled
1 1/8 cup granulated sugar
3 cups heavy cream, well chilled
1 1/2 teaspoons pure vanilla extract
1 tsp. pure almond extract
1 1/2 cups shelled pistachios, roughly chopped (use plain or lightly salted and don't use red)

Combine the whole milk and sugar in a mixing bowl and mix by hand or with a mixer on low speed until the sugar has dissolved. Stir in the heavy cream and the two extracts.

Set-up the machine and turn it on. Pour the mixture slowly into the bowl and churn until thickened. When it is close to being the desired thickness, add the pistachios. Once done, use right away or freeze for up to 12 hours to let it set. Use within a day or two.

Friday, August 17, 2007

Rhubarb Cake

One of the true treasures of my cookbook collection isn't Baking: From My Home to Yours, Tartine, or even the King Arthur Flour Cookie Companion. It's an old plastic bound collection of worn-and-torn pages between two laminated pieces of yellow construction paper. The title quotes Psalm 37.3 in black script, fancier than everyday handwriting but by no means calligraphy. "You Shall Be Fed" it proclaims. This was the fundraising effort of the United Methodist Women of Zion United Methodist Church of Denmark, WI. The purpose was to raise funds for a new addition for the church, a hand-drawn picture of which is there for your inspection, on the dedication page just past the front cover. There are no full colored, highly styled photographs but the page dividers do have little black magic marker doodles illustrating the subject of the pages that follow it. The recipes are terse. These are not instructions, these are formulas. There are no sidebars explaining terms and techniques, no science lesson on the Maillard reaction. It is expected that you know how to 'cook' because why on earth would you be buying a cookbook if you have never been in a kitchen before?

These old books, passed over many times in used book stores for the Food Network production overruns, are truly treasures. Has Rachel Ray ever included a recipe for ice?

1 empty 1/2 gal. milk carton (preferably Lake to Lake)
Water

Pour water in 1/2 gallon carton and put in freezer until firm. Can be broken apart for crushed ice or left whole and used to keep things cold in cooler or box. May be refrozen.

Does "Whoever has a heart full of love always has something to give." sound like a quote from a Tony Bourdain book? Of course not.

But I have to admit it's more than just kitsche that brings me back repeatedly. Many of the names that appear throughout this book are the same names that appear throughout my family tree. Plus, it has notes on the recipes, and a few more grandmother.

recipes in the blank space, in the familiar hand-writing of my

Take, for example, this recipe for rhubarb cake from my great-grandmother.

Rhubarb Cake
Elsie Schneider

1/2 c. shortening
1 1/2 c. sugar
1/2 tsp. salt
1 lg. egg
1 tsp. soda in 1 c. sour milk or buttermilk
2 c. flour
1 tsp. vanilla
3 c. rhubarb (cut in pieces)

Use well greased pan. Cream shortening, sugar, salt, and 1 large egg. Add soda, buttermilk, flour, and vanilla.

TOPPING:
3 c. rhubarb - cut in pieces. Sprinkle 1/2 c. sugar.


That's it, that's the entire recipe. It was assumed you would know things like oven temperature for baking cakes and times. My grandmother wrote "Bake 350° 45min" in the margin (that would be a 'Moderate Oven' according to the helpful oven chart included at the book's beginning).

I've made this cake several times now, first with just rhubarb and with a rhubarb-cherry mix. Both times it was delicious. The cake, though sweet, highlighted the fruit without overpowering it. The cherries and rhubarb worked well paired, and I think I could have even reduced the sugar in the topping by a quarter cup or even all of it.

Friday, April 20, 2007

Easter Bunny Cupcakes

If you came to my site on Easter (or scrolled down a bit I guess), you were greeted by a picture of the finished army of these cupcakes. This was the first part of the Easter baskets Lorrie and I created. Originally, I hadn't planned on doing these. As Easter approached I assumed I'd be doing cut-outs again in rabbit and egg shapes. I changed my plans when I decided to try to do some things with less sugar but I still wanted a couple things in the basket that still were pure, unadulterated sugared-up treats.

I used a yellow cake recipe for the cupcake base. Lorrie and my uncle can't have chocolate so that's always in the back of my mind and something I plan for. I've used this recipe before for cupcakes and I know it tastes good. Going forward though I think I will look for something else. This recipe tastes good and is easy enough to make but still it is much more dense than I would prefer. I think I can do better.

I spent a lot of time trying to think of how to decorate these. I had the idea to do an Easter basket theme right away but it was trying to figure out the execution of it that took a while. My first thought was the Peeps chicks, but when I saw the packages and the actual size of each chick, I knew there wouldn't be room for anything else. It had to be the bunnies. I liked the malted milk robin eggs over any of the jelly bean options at the store and they stayed in the theme well as the decorated eggs in the basket. The grass was something I didn't expect to find or use. I used green-dyed coconut last year for the grass and wasn't going to give it a second thought this year until I found this new candy grass right next to the Peeps at Target. Made from potato starch and corn starch, the grass really didn't have much flavor but worked as an alternative to the coconut. Plus, I hate coconut so I was really going to try anything else. I think I spent the longest time brainstorming on how to stick all this on the cupcakes. I didn't want strong flavored frostings and some just don't hold well. In the end, I used marshmallow creme as the frosting. This worked really well. A little dab on the bottom of the Peeps bunny held it in place, for the most part. The marshmallow creme as frosting actually worked very well and was rather easy to put on and spread. Much easier than some of the frostings/glazes I've used in the past. Some did dribble down the sides and it did melt slightly in the sun but really, frosting makes a mess too.


Yellow Cake
from page 352 of the The King Arthur Flour Baker's Companion: The All-Purpose Baking Cookbook

Makes 12 cupcakes

12 Tbls. (1 1/2 sticks) unsalted butter
1 3/4 cups (12 1/4 oz) sugar
3/4 tsp. salt
2 1/2 tsp. baking powder
2 tsp. vanilla extract
4 large eggs plus 2 yolks
2 3/4 cups (11 1/2 oz) unbleached, all-purpose flour
1 1/2 cups milk, buttermilk, or yogurt (I used buttermilk)

Preheat the oven to 350° F.

In a large bowl, cream together the sugar, butter, salt, baking powder, and vanilla until the batter is fluffy. This should take at least five minutes. Also, make sure your butter and eggs are at room temperature. This is a requirement for making a butter cake.

Add the eggs and yolks one at a time. Beat thoroughly before adding the next. Then slowly fold in a third of the flour, then half of the milk, then another third of the flour, the remaining milk, and then the last of the flour. Only stir until mixed. Overmixing will reduce the volume of air trapped in the butter and sugar.

Pour into your greased or paper-lined cake pans or cupcake pans. Cooking times vary by shape but the cupcakes took about twenty-five to thirty minutes and rotate the pan 180° about twelve minutes in. Cool in the pan for about five minutes for cupcakes and ten minutes for a cake and place on a wire rack to cool completely.

Wednesday, March 28, 2007

Peanut Brittle

I've been waiting for a chance to try this recipe from Kate Zuckerman's book The Sweet Life: Desserts from Chanterelle, and a "Food Day" at work tomorrow is the perfect excuse. I like this book a lot; it's well written and contains a ton of information and tips. She shares the pastry chef perspective and that adds so much to a recipe that a novice like myself can understand more than just ingredients and cooking times but also methodology, presentation, and repeatability.

This recipe is a perfect example. Just about every peanut brittle recipe I've seen is basically boiling the sugar, adding the nuts, cooling in a pan, and then breaking into pieces. No frills. The steps Kate lays out allow for variation at certain places while still maintaining your ability to recreate a well-finished piece. Cooling the caramel and grinding it allows you to change nuts within the same batch. Want to do some almond and some peanut? No problem. Another benefit of grinding? It gives you more control over what the final product will look like so you can make circles or tubes instead of broken glass-like pieces. That's just a great way to impress your friends.

Following this recipe made me feel more like a "chef" than a cook, if I may be so bold so obviously I can't recommend this book enough.


Thin and Delicate Peanut Brittle
from page 204 of the The Sweet Life: Desserts from Chanterelleby Kate Zuckerman

1 cup sugar
1/3 cup water
1/8 tsp. cream of tartar
1/2 cup ground peanuts
1/4 tsp. finely ground sea salt

Preheat the oven to 350° F and prepare a 11"x17" baking pan with parchment, nonstick baking pad, or aluminum foil.

In a small, heavy-bottomed pan combine the water, sugar, and cream of tartar and heat over high heat. When the mixture begins a rolling boil, reduce the heat to about medium-high. Once the color changes to a golden brown caramel color, remove from the heat and pour into the prepared pan to cool.

Once the caramel has cooled, break it up into small pieces. Use a food processor or coffee grinder to grind the caramel into a fine table sugarlike consistency. Combine this with the ground peanuts.

Prepare your baking pan again. Pour this mixture into the prepared pan and spread very thin (1/8 inch thick). Bake the candy for about 4-6 minutes, until it melts and bubbles. Remove from the oven and evenly sprinkle the salt over the candy. Let cool and break into pieces to serve.

This will keep for up to 2 weeks in a sealed container in a cool, dry place. Humidity will rob this brittle of its crunch.

Saturday, March 17, 2007

Irish Dairy Bread

St. Pat's Day: Green or Irish

I believe this is the first time I've recognized St. Patrick's Day by baking something instead of drinking something. Previous celebrations took place in various drinking establishments, the best being a little country bar just north of Milwaukee actually owned by an Irishman and not some dork wearing a plastic green hat and calling himself "O'Lucas" all night. But hanging out at Finbar's wasn't about getting drunk. You were there with friends, having a great time, enjoying the atmosphere of real Irish music and food.

Now one of the things you may get during an Irish meal is a couple of pieces of soda bread. This bread is dense but tasty and requires few ingredients and just a little bit of time to make. The leavening is performed by the reaction between buttermilk and baking soda so there's no yeast and no waiting for the dough to rise. I have to admit I was impressed how much this bread rose too. Many muffins use the same buttermilk-baking soda reaction but they don't double in height like this bread did (near the end off baking it came dangerously close to the rack above it).


Irish Dairy Bread
from page 122 of the The King Arthur Flour Baker's Companion: The All-Purpose Baking Cookbook

Makes one 9-inch loaf

4 cups (17 oz) unbleached all-purpose flour
3/4 teaspoon baking soda
1 teaspoon salt
1 tablespoon unsalted butter at room temperature
1 1/2 cups buttermilk

Preheat the oven to 375° F and prepare a baking sheet or cast-iron pot by lightly flouring it.

In a large bowl combine the flour, baking soda, and salt and whisk together thoroughly. Add the butter and distribute the butter evenly through the flour mixture. Create a hole in the center of the flour and pour the buttermilk into it. Stir to combine the ingredients.

Take the dough out of the bowl and knead on a lightly floured surface. Once the dough comes together, form a ball and then press down until it is about 1.5 to 2 inches thick. Cut an "X" into the top and place in the pan. If you are using a cast-iron pot with a lid, put the lid on. Bake in the oven for 35 minutes (for baking sheet) to 40 minutes (for cast-iron pot). Once done, cool on a wire rack. Do not cut until completely cooled.


I've submitted this to Zorra of 1x umrühren bitte and her St. Pat's Day: Green or Irish round-up. I found this blog when I first started reading food blogs, it always has great pictures of bread which I imagine probably taste pretty good too. She also has many of these events, with my favorite, the culinary Advent calender (2005 and 2006).

Thursday, February 08, 2007

Whole Wheat Pizza Crust

A common dinner for Lorrie and myself is a couple of individual pizzas. I'll get a package of flatbreads from the store and a couple of toppings to put on them. Flatbreads on the pan, toppings on the flatbread, oven, bake, pizza. Pretty simple but tastes great. The past couple of weekends I've been creating my own flatbreads for the pizzas. The recipe I'm using is based on a whole wheat pizza recipe in the King Arthur Flour Whole Grain Baking cookbook. Honestly, I could tell you I researched the recipes and chose this one because of so-and-so reason but really I chose the recipe because it didn't use pre-ferments or need to sit overnight. The usual ingredients for our pizzas are garlic, olive oil, spinach (wilted in a hot pan first), sliced tomato, and provolone cheese.


Whole Wheat Pizza Crust
based on the Herbed Whole Wheat Pizza with Mushrooms and Spinach on page 134-136 of the King Arthur Flour Whole Grain Baking: Delicious Recipes Using Nutritious Whole Grains cookbook.

Makes 2 12-inch rounds

3 3/4 cups (15 oz.) white whole wheat flour (I used the King Arthur Organic Whole Wheat)
1 Tbls. + 1 1/2 tsp. instant yeast
1 1/2 cups (12 oz) cool water
1 Tbls. honey
1 Tbls. olive oil
2 tsp. salt
1 Tbls. dried oregano
1 Tbls. dried basil
1/2 tsp. cayenne pepper

In a medium bowl put 2 cups of the flour and all of the yeast. Measure out the water and add to that the honey and stir until it's combined. Add the water-honey mixture to the flour and yeast and mix thoroughly. Cover the bowl with plastic wrap and let sit for an hour.

After the hour, remove the plastic wrap and add in the remaining ingredients and mix. Remove the dough from the bowl and knead on a lightly floured surface for 5 minutes or so. Stop kneading when the dough is shiny and elastic yet soft. Have a baker's bench knife handy to help if the dough sticks because you don't want to over-flour this. Put the dough back into the bowl, cover, and let sit for another 90 minutes. After about 90 minutes the dough should have doubled in size.

Once this second rise is done, turn the dough out onto the lightly floured surface. Divide the dough in half and form each half into a round. Cover these rounds and let them rest for another 20 minutes.

Preheat the oven to 375° F (with a baking stone if that is what you use). Roll each round out to a 12-inch round and put on your pan, baking sheet, or parchment paper. Use a fork to prick the crust all over (if you look at the first picture you will see the dough puffed up; I missed this step the first time through). If you want a traditional end crust, roll up the edges. Bake the crusts individually for 10 minutes and remove from the oven.

At this point you have 2 crusts for use. Use immediately or let cool completely and freeze. When you add your toppings and bake, bake the pizza at 425° F.

Sunday, February 04, 2007

Lemon Squares

On nights when temperatures are below zero, it's hard not to let the mind wander and think about warmer times. When I do this, my thoughts drift towards the approaching spring season. My first round of golf for the year may only be a month a way, time to start hitting the driving ranges. Garden planning should begin now. It won't be totally pitch black when I leave work. While I like the colors and hues of winter, when I think of spring I start thinking of bright colors like yellow. This is the reason when I saw this recipe for lemon bars, I thought of spring.

Lemon Bars
from the Spring 2007 issue of The Baker's Companion magazine, page 47.

Crust
1 1/2 cups (6 1/4 oz.) unbleached all-purpose flour
1/4 cup (1 oz.) powdered sugar
1/4 tsp. salt
1/2 cup (1 stick) butter

Topping
4 large eggs
1 1/4 cups (8 3/4 oz.) granulated sugar
1/2 cup (4 oz.) lemon juice
1/4 cup (1 oz.) unbleached all-purpose flour
1/2 tsp. salt
2 Tbls. lemon zest (2 lemons worth) or 1/2 tsp. lemon oil
powdered sugar for sprinkling

While preheating the oven to 350° F, grease a 9x9 inch (or similarly dimensioned) pan.

Make the crust first. In a medium-size bowl, combine the flour, sugar, and salt and mix thoroughly. Cut in the butter using your fingers or a pastry blender. Mix until the crumbs are coarse. Put the crumbs in the pan and press to form the crust. Bake this for 20 minutes. It's done when the color is a light brown.

For the topping, cream the eggs, sugar (granulated), and lemon juice until it's smooth. Fold in the flour, lemon zest or oil, and salt. Pour this over the crust once it is finished with the pre-bake and bake for another 25 minutes. These bars are done when the topping appears set. Remove from the oven and let cool in the pan. Just before serving, sprinkle with powdered sugar.

A tip for one of Lorrie's coworkers: Use a cookie cutter or a stencil to give the sprinkled powdered sugar a shape.

Tuesday, January 30, 2007

Almond Honey Caramel Chews

These candies might just be the best thing to ever come out of my kitchen. Better than the sugar almonds. Better than any cookie I've ever made. Heck, better than anything to come off of my grill.

The flavor and texture is incredible. A little crunchy when you first bite into them that dissolves into a wonderful caramel and almond chewy candy with a hint of honey. These are perfect for a party, be it a Super Bowl party or just having friends over.

These are not hard to make, they just take time. The cooking process is slow so there is no worrying about the candy heating or cooling too fast.

Almond Honey Caramel Chews
from page 193 of the The Sweet Life: Desserts from Chanterelleby Kate Zuckerman

Makes about 50 candy pieces

14 oz. (about 4 cups) sliced, blanched almonds
1 cup heavy cream
1 cup whole milk
2 sticks (16 Tbls.) butter
3/4 cup honey
1 1/2 cup sugar
1 Tbls. light corn syrup

Preheat the oven to 350° F. Place the almonds on a baking sheet and bake for 10-15 minutes. They are done when their color is brown and there is a noticeable nutty smell. Take out of the oven and place in a bowl.

Prepare a 12x8 inch pan (or a pan with a similar area) by greasing the pan and placing parchment or aluminum foil on the bottom.

In a heavy bottomed pan with a candy thermometer attached, combine all the ingredients but the almonds and heat over medium-high heat. Make sure the pan can hold four or five times the initial ingredients. I used a 4 qt. pan and it nearly overflowed when it reached the boiling point. Bring the mixture to a boil. Once the color changes to a light golden brown, reduce the heat to medium-low. Continue cooking until the temperature reaches 260° F, stirring about every two minutes. Once it reaches 260° F, remove the pan from the heat.

Fold in the almonds. Pour this mixture into the prepared pan. Bake the candy for 10-12 minutes. It is done when air bubbles appear all over the candy. Remove from the oven and let cool in the pan for at least 4 hours.

Carefully cut the cooled candy into desired shapes.


Also appearing at Sugar Savvy.

A real treat, Kate Zuckerman found my site and left suggestions for variations of these candies! Check out her comment in the comment section and her wonderful site PastryChat. She mentions my attempt at her recipe here. Very cool!

Monday, January 29, 2007

Granola Grabbers

I was looking for a cookie I could bake for a Super Bowl party. I wanted something that was hearty and could hold it's own with the various dips, hors d'œuvres, and brownies. These cookies are perfect. Filled with almonds, peanuts, coconut, and raisins, there's a little something for everyone here.

These are also great as a midnight snack. The cookies are crunchy and chewy at the same time, a combination that just begs to be paired with milk.


Granola Grabbers
from page 82 of the Baking: From My Home to Yours by Dorie Greenspan

Makes about 40 cookies

3 cups granola (no fruit)
3/4 cup raisins
1/2 cup salted peanuts
1/2 cup slivered almonds
1/2 cups sweetened shredded coconut
1/3 cup wheat germ
1 3/4 sticks (14 Tbls.) unsalted butter at room temperature
3/4 cup (packed) light brown sugar
1/4 cup sugar
1 large egg
1/4 teaspoon salt
1 cup all-purpose flour

Preheat the oven to 375° F and prepare 2 baking sheets.

Combine the granola, raisins, peanuts, almonds, coconut, and wheat germ in a bowl and mix well. Set aside for later.

In a mixer beat the butter for 2 minutes at a medium speed. Add the brown sugar and the granulated sugar and cream for 3 minutes or so. Add the salt and the egg and mix thoroughly. Reduce the mixer speed to low. Add the flour and once it is just mixed, add the granola mixture. Stop the mixer once all the granola, nuts, and fruit are just combined. You do not want to over beat this batter. Use a spatula to incorporate any remaining dry ingredients.

Take a heaping tablespoon of the dough and gently pack. Place each cookie about 1 1/2 inch from each other though these won't spread a lot. Flatten them down a tiny bit using your fingertips.

Bake for 10-12 minutes. About halfway through, rotate the pans 180° and switch the pans on the racks. The cookies are done when they are a golden brown but not hard. Remove from the oven, let cool in the pan for a minute or two, then transfer to a wire rack to cool.


Also appearing at Just Baking and featured on the Well Fed Network.

Tuesday, January 16, 2007

Bourbon Bread Pudding

Bread pudding, in some form or another, has probably been around as long as man has been baking bread. Thought to be first made by thrifty cooks as a way to use stale bread, bread pudding may have started from simple and plain roots but over time it has developed into the decadent dessert we know today.

Early recipes often were little more than bread soaked in water or milk and then sweetened and then baked/steamed. As time went on and cooking techniques evolved, ingredients became more readily available, and recipes became more sophisticated, things like butter, cream, eggs, fruit, liquors, etc were added for flavorings. Today's recipes have come a long way from the days of hollowed out bread loaves filled with milk and spices.

Popular in England and the southern United States, it is not uncommon to find bread pudding on a menu as an alternative to chocolate and/or fruit desserts.

I found the recipe below while searching for a dessert for a meal I made last weekend. This slightly sweet bread pudding with the flavors of bourbon and vanilla was the perfect end to a meal of beef tenderloin, pan-seared scallops with pancetta and pomegranate seeds, and grilled asparagus.


Bourbon Bread Pudding
from page 407 of the Baking: From My Home to Yoursby Dorie Greenspan

Makes about 8 servings

8 oz. baguette or egg-based bread, preferably stale
1 1/2 cups whole milk
1 1/2 cups heavy cream
4 large eggs
2 large egg yolks
1/2 cup sugar
1/2 tsp. ground cinnamon
dash of freshly grated nutmeg
1 Tbls. bourbon
1 1/2 tsp. pure vanilla extract
1/8 tsp. pure almond extract

Boil a pot of water and turn off the heat once it starts boiling. While the water is coming to a boil, cube the bread into 1-inch pieces. If the bread is not stale, spread it in a single layer on a baking sheet and bake in a 350° F oven for 10 minutes. Put the stale bread cubes in a glass or ceramic 9-by-5 inch loaf pan.

In a heavy bottomed pan, heat the milk and cream just to the point where they start boiling and then turn the heat off. While they are boiling, mix the eggs, yolks, sugar, and cinnamon in a bowl. Once the milk and cream mixture is ready, start adding it a little at a time while whisking. This will temper the eggs; add the milk and cream too fast and the eggs could curdle. It is important to keep whisking while slowly adding the remaining milk. Now add in the bourbon, vanilla, and almond extract. If you are a fan of Justin Wilson and are so inclined, go ahead and check the bourbon to be sure it's fine. Once blended, gently tap the bowl on the counter to remove any air bubbles and then pour the custard mixture over the bread. Using the back of a spoon, gently press the bread cubes down in the pan, allowing the custard to completely cover the cubes. Cover with some wax paper and let the bread soak for about an hour, making sure to press the bread down occasionally.

Preheat the oven to 350° F. Place a couple of paper towels in a roasting pan large enough to hold the loaf pan. Remove the wax paper and cover the loaf pan with aluminum foil. Poke a couple of holes in foil. Put the pan of bread pudding in the roasting pan and place in the center rack of the oven. Add the water you boiled previously until it comes halfway up the sides of the loaf pan. Bake for 30 minutes and then remove the foil and bake for another 15 minutes. The pudding is done when it is puffed up, golden, and a cake tester or similar item can be inserted deeply into the middle and be removed cleanly. Remove from the water bath and let it cool on a rack. Serve warm or at least at room temperature. Store leftovers tightly covered in the refrigerator for a day. Bring back to room temperature to serve.

The whip cream in the picture was made from whipping a cup of cold heavy whipping cream by hand and when peaks form, add about 3 Tbls. powdered sugar and 2 tsp. of the bourbon. It is slightly sweet but highlights the flavor of the bourbon in the pudding.


Also appearing at Just Baking and featured on the Well Fed Network.

Sources:
Baking: From My Home to Yoursby Dorie Greenspan
Food Timeline-- history notes: puddings

Thursday, December 28, 2006

Lebkuchen

Lebkuchen is a form of gingerbread common in Germany. The difference between Lebkuchen and what we Americans typically think of gingerbread is it's made with honey instead of molasses, hence the lighter color. Lebkuchen was developed in the 13th century by Franconian monks though the development of the name Lebkuchen is still a mystery. The most likely explanation is it comes from the Latin word for a flat, unleavened loaf, libum. However the more popular (and less academic) belief is the name comes from the German word Leben, which means life. In fact, it is believed that eating these "life cakes" can chase away the winter blues.

The city most famous for its Lebkuchen is Nuremberg. Located on a major spice route, records show Lebkuchen was baked in Nuremberg since the late 14th century. Nuremberg Lebkuchen is a protected food product in Europe and its production is strictly controlled. The highest quality Lebkuchen of Nuremberg is given the title Elisen, supposedly named after a daughter of a Nuremberg baker.

This particular recipe uses crystallized ginger instead of the more common candied fruit. This change causes the spicy flavor of ginger to be strong in these bars. The bars themselves are dense but soft. The bars do rise slightly while baking but they will basically be the thickness you roll them out to be. If you try to roll them out thin like a sugar cookie I believe you would get a hard, dense cookie that might be tough to chew. The dough is sticky, very sticky. It was probably the toughest cookie/bar/etc. dough I've worked with yet. And there is the time factor. The dough must chill overnight in this recipe (and many others). I recommend that when chilling the dough, gently work it into a ball shape so only a small portion of the dough touches the bowl. It will be much, much easier to remove from the bowl the next day. Still, the rewards of this delicious bar outweighed the work involved.


Lebkuchen
from page 198 of the The King Arthur Flour Cookie Companion: The Essential Cookie Cookbook

Makes about 24 bars

3/4 cup (9 oz) honey
1/2 cup (4 oz) light brown sugar
1 large egg
2 tsp chopped lemon zest or 1/4 tsp lemon oil
2 tsp chopped orange zest or 1/4 tsp orange oil
2 1/4 cups (9 1/2 oz) unbleached all-purpose flour
1/4 tsp baking soda
1/2 cups (2 oz) finely chopped blanched almonds
2 tsp cinnamon
1 tsp ground ginger
1 tsp ground nutmeg
1 tsp ground cloves
3 rounded Tbls (1 3/4 oz) diced crystallized ginger
6 Tbls brandy
1 cup (4 oz) powdered sugar

Combine the honey and the brown sugar in a saucepan and bring to a boil while stirring occasionally. Once boiling, remove from heat and let it cool until it's only slightly warm. Using a food processor, chop the crystallized ginger until it is fine. Mix the honey-brown sugar mixture, egg, lemon zest or oil, and orange zest or oil in a large bowl until they are well mixed. Add in the spices, flour, crystallized ginger, baking soda, and almonds and mix until they are thoroughly mixed. This produces a stiff and very sticky dough. Very sticky. Cover the bowl, put in the refrigerator, and let sit overnight.

When you are ready the next day, preheat the oven to 350° F and grease a 9x13 inch or equivalent sized pan. Remove the dough from the refrigerator and place on a lightly floured surface. Roll out the dough to fit into the pan. The dough will be very sticky but try not to over-flour everything. Put the dough in the pan. I rolled it onto the rolling pin and then unrolled it in the pan. Fit the dough into the pan the best you can but don't press down too hard. I greased my fingers and that worked pretty well. Bake for about 20 to 22 minutes. In the meantime, mix the brandy and the powdered sugar. This glaze isn't very thick. The bars are down when a cake tester or toothpick comes out clean. Transfer to a cooling rack immediately and begin glazing. Apply the glaze in layers so each layer has time to soak in and harden. Once fully glazed and cooled, cut into 1x2 inch bars. If you store these in an airtight container with a slice of apple, they will stay soft.


Also on Just Baking.

Sources:
Lebkuchen at Wikipedia
German Embassy in Washington DC
Nuremberg Gingerbread Tour
The King Arthur Flour Cookie Companion: The Essential Cookie Cookbook
Germany's Regional Recipes
German Cookery: The Crown Classic Cookbook Series (Crown Classic Cookbook)
The German Cookbook: A Complete Guide to Mastering Authentic German Cooking

Monday, December 18, 2006

Chewy Date-Nut Bars

I decided to help my mother and my aunt out by making some bars for the reception after my grandmother's funeral. When I volunteered I didn't have any set plans or recipes in mind so I started paging through the bar cookie section of the King Arthur Flour Cookie Companion,trying see what jumped out at me. I have to admit, this is my favorite book. Every recipe I've tried worked the first time and tasted great. The variety of recipes means I have recipes for just about any occasion. In fact, when I first started baking again over a year ago, this was the first book I bought and have used consistently since.

While paging through the different recipes, I only had one guideline in mind: no chocolate. I wanted something that everyone could try and Lorrie and my uncle Joel don't eat chocolate. It was a good thing I had this rule too. These were one of the few non-chocolate choices at the reception. Other people had brought a lot of things that contained chocolate. This date bar caught my attention because the description talked of yellowed recipes and of days past. 'Historic' or 'back in the olden days' anything will always make me stop and look.

Now, my dad likes date bars a lot. My aunt Nancy makes date bars he absolutely loves. Her bars have a very strong date flavor (duh, hence the name) which is not the rest of the family's cup o' tea. These bars had a more subtle date flavor and received a thumbs up from every member of the family and many of Lorrie's coworkers. I really thought these bars were good. They were moist and chewy with a little sweetness and a little flavor of date while the walnuts provided a little tooth when you bit into the bars. I will make these again.

Chewy Date-Nut Bars
from page 195 of the The King Arthur Flour Cookie Companion: The Essential Cookie Cookbook

Makes about 16 bars

2 large eggs
1 1/4 cups (5 1/4 oz) unbleached all-purpose flour
1/4 teaspoon salt
1 teaspoon baking powder
1 cup (8 oz) brown sugar (I used dark)
1 cup (4 oz) chopped walnuts
1 cup (5 1/4 oz) chopped dates
Powdered sugar for dusting

Preheat the oven to 400° F. In a mixing bowl large enough to hold all the ingredients, beat the eggs until frothy. In a different bowl, add the flour, salt, baking powder, and brown sugar and whisk together until they are sufficiently mixed. Add these dry ingredients to the eggs and stir until mixed. Fold in the dates and walnuts. Grease a 9x9 inch pan. Put the batter into the pan and spread evenly. I recommend using your fingers. Make sure they are well greased because this batter is very sticky. Bake the bars for 18 to 22 minutes. They are done when they are golden brown and the top of the bars is shiny. Since we want chewy bars, not crunchy, the center should be slightly wet when a toothpick or tester is inserted into the middle. Overbaking will dry these bars out making them crunchy. Cool them completely before cutting. Dust the tops with powdered sugar.

Wednesday, December 06, 2006

Sugar Almonds

While doing research for an article about Stollen for Just Baking, I ran across a recipe for sugar almonds that piqued my curiosity. I was intrigued by the simple list of ingredients and the method used to create a hard candy shell, so I gave it a try. The results were surprisingly excellent. The candy coating gave the almonds a good crunch when you bit into them. The flavors of the sugar, cinnamon, and almonds were well balanced. No flavor overpowered another. The small amount of cinnamon was noticeable and highlighted the sweetness of the sugar. These almonds would be popular served at a party or on a dessert tray. They would also make a wonderful gift from your kitchen, in a decorated jar or container.

The key to the recipe is not overcooking the almonds, a lesson I learned the hard way. While preparing a batch I was paged for work and ended up overcooking the almonds because of the distraction. Although the shell still formed and had the desired crunchiness, the flavor and texture of slightly burnt almonds made them unpleasant to eat. I also made batches in different size pans (two and four quart) and found that the bigger pan made it easier to keep the almonds separate at the end.

The recipe is from German Cookery: The Crown Classic Cookbook Series (Crown Classic Cookbook). It’s recipe number 494 (page 199), which is in the candies section of the chapter entitled “Christmas Cakes and Candies”.

Sugar Almonds
4 Tbls. water
3/4 cup granulated sugar
3/4 cup shelled almonds (do not use blanched)
1/4 tsp. cinnamon

Grease a jelly roll or similar pan and place two forks by it. Combine water and sugar in a heavy bottomed sauce pan and heat until this forms a thick syrup. The water will boil off. When the syrup is ready, remove it from heat, gently add in the almonds, and stir constantly. Continue to stir until the sugar syrup begins to crackle, which does not take long and occurs while the syrup is still liquid. Place this over heat again. The sugar will crystallize and form a white grainy coating; continue heating and stirring until all the sugar is melted again. Once all the sugar is melted, mix in the cinnamon. Remove from heat and pour onto greased pan. Separate the almonds with the forks, working quickly before they cool and fuse together.


As posted at Sugar Savvy or as one of the featured articles at Well Fed...

Sources for Sugar Almonds:

Tuesday, December 05, 2006

Stollen

Stollen is a traditional German fruitcake made to celebrate the Christmas season. Although many recipes exist, the most famous is the Dresden Stollen (”Dresdner Weihnachtsstollen” in German). The city of Dresden is also where Stollen was first created in the 15th century and sold at the Striezelmarkt Christmas market. Originally called Striezel, the once folded over shape of the Stollen was meant to represent the baby Jesus in swaddling clothes. Later miners renamed it because they thought it looked like the opening to a mine or Stollen.

The original recipe for Stollen contained no dairy products. Historically, the Advent season was a time for fasting and things like milk and butter were not allowed. So the original Stollen was hard and relatively tasteless. In 1674 Prince Elector Ernst and his brother Duke Albrecht petitioned the Pope to allow their bakers to use butter. The Pope granted them a “butter-letter” which allowed only them the use of dairy during the fasting period. A few years later other bakers were also allowed to use butter but they had to pay a fine. The fines for using butter stopped when Saxony became Protestant.

Every year in Dresden they hold the Dresden Stollen Festival. It occurs on the Saturday before the 2nd Sunday of Advent, which is December 9th this year. Over 700,000 people take part in a day which includes a parade and the ceremonial cutting of the 3 to 4 ton giant Stollen by the Royal Master Baker and the Stollen Maiden. Pieces of the giant Stollen are sold to guests with part of the money generated going to charity.

The recipe below is from Mimi Sheraton’s wonderful cookbook The German Cookbook: A Complete Guide to Mastering Authentic German Cooking. It is on pages 450-451 and is bookended by two other recipes for Christmas breads. While researching the history of Stollen, I also found this was the recipe promoted by the German Embassy in Canada.

Stollen

Makes 3 loaves

1-1/2 cups raisins
1 cup chopped citron
1 cup chopped candied orange peel
1/2 cup rum
6 to 8 slivered blanched bitter almonds or 1 teaspoon almond extract
2 envelopes dried powdered yeast
1/2 cup luke-warm water
1 tablespoon sugar (optional - used to activate the yeast quickly)
2 cups milk
1 cup sugar
2 teaspoons salt
1-1/3 cups butter
1 lemon rind, grated
2 tbs. rum
2 cups flour
4 eggs, lightly beaten
5 to 7 cups flour
1-1/2 cups chopped blanched almonds
melted butter
granulated sugar
confectioner’s sugar (vanilla flavored is preferred)

Soak the raisins, citron, and orange peel in rum for about an hour and then drain but save the rum. Follow the directions on the package to activate the yeast in warm water. Scald the milk and add the sugar, salt, and butter. After the butter has melted, add to the mixture the rum, lemon peel, and almond extract if you are not using bitter almonds. Let the mixture cool until it is lukewarm in temperature. Add the yeast mixture to this as well as 2 cups of flour. Mix thoroughly and let it sit in a warm area with no draft until the dough blisters (about 15-30 minutes). When the dough is ready, lightly beat the eggs and add them in. Slowly mix in the additional 5-7 cups of flour until the dough is not sticky, but soft and light and smooth enough to handle.

Dry the soaked fruit and lightly dredge it with flour. Place the dough onto a thoroughly floured board to knead. While kneading, add in the fruit, almonds, and bitter almonds if you are not using the almond extract. Continue kneading until the dough is smooth and elastic and blisters. Form a ball and put in a floured bowl. Brush the dough with melted butter, cover with a thin towel, and place in a warm, draft-less area to rise for about an hour. The dough should double in bulk. Punch the dough down and divide into three smaller balls.

Let the dough rest for 10 minutes and then roll each ball into an oval about 3/4 of an inch thick. Brush the tops with melted butter and sprinkle a small amount of sugar over them. Fold each oval in half length-ways so the edge of the top half doesn’t quite meet the edge of the bottom half. Place all three loaves on a buttered baking sheet and again brush with melted butter. Allow the loaves to rise in a draft-free, warm area until they double in bulk again (about 1 hour).

Preheat your oven to 425° F. First bake the loaves for 10 minutes and then turn the heat down to 350° F. Bake the loaves for roughly 45 minutes. The loaves are done when they are golden brown. Remove from the oven and place on a cooling rack. While still warm, brush the loaves with melted butter and generously sprinkle the confectioner’s sugar over them. The confectioner’s sugar should cover the top of the loaves like an icing.

Stollen is served in 1/4 inch to 1/2 inch slices and sprinkled with additional confectioner’s sugar. It does store well in a cool place (not in the refrigerator).

As posted at Just Baking.

The photo used was taken from the Flickr account of Rene Schwietzke and used under the Creative Commons Attribution 2.0 license.

Thursday, November 09, 2006

Pumpkin Muffins

This past Sunday I tried a second recipe from the latest book in my collection, 500 Cupcakes: The Only Cupcake Compendium You'll Ever Need. I was not thrilled with how the Pistachio & Apricot Muffins turned out and when I needed to make my Halloween cupcakes I went elsewhere for recipes I trusted more. However, I don't want to condemn a book from one bad recipe and other recipes that seemed very different than recipes from other books so I made a batch of cupcakes using a different recipe. I'm glad I did. This time things turned out much better.

Pumpkins are everywhere this time of year so I tried the Halloween Pumpkin Muffins from page 198 of 500 Cupcakes. Unlike the last muffin recipe I tried from this book, the dry ingredients to wet ingredients ratio was more on par with what I expected. A major difference this time was the amount of flour was less than half the Pistachio & Apricot Muffins. Also, no butter. This recipe called for vegetable oil. Flavoring was pumpkin puree, cinnamon, and allspice. I used canned pumpkin and I don't regret it one bit. I made my own fresh pumpkin last year and it was fine and all but a lot more work (I roasted) for results that were a little better. Not to say I wouldn't do it again, especially if I was making a soup or something and wanted to use the pumpkin halves as bowls or if I got a really good deal on pumpkin. It's just in my opinion the canned pumpkin is pretty good for something coming in a metal container. But I'm digressing. I combined the dry ingredients and the wet separately and then folded the dry in until they were just mixed.

Now here's where the book got a little screwy. The recipe says this makes 6 large muffins. When I hear large muffins, I think of ones bigger than my fist, six to a pan large. The muffins you get at a coffee shoppe and you need both hands to carry the plate kind of big. The intro caption for this recipe says "Decorate these cupcakes with skeletons for when the trick-or-treaters come calling." I'm reading the recipe thinking, yeah, these trick-or-treaters are going to work themselves into a frenzy when I pop open the door and reward their shy/enthusiastic "Trick-or-treat!" with a frosted muffin the size of their head! But that's not the picture the book gives me to use as a guide. The picture given with the recipe shows what I consider a standard size, twelve to a pan size. Reality is there is enough batter to make six large or twelve regular muffins but still a little weird. These really were good looking muffins coming out of the oven. The book has these cupcakes with cut-out fondant but I didn't want to do that, I was planning on using a cream cheese frosting. I didn't have a chance to make a homemade frosting for these so I just used one of the store bought whipped varieties. To top them off, little candy sprinkles shaped and colored like autumn leaves.

I liked these muffins. They were moist and tasted wonderful. The cream cheese frosting was a good choice flavorwise. The pumpkin flavor of the muffin was strong and matched well with the frosting. The candy sprinkles not only added color but a little crunch too when you bit into them. I know these went fast when Lorrie took them to work. I would definitely recommend this recipe.

OK, 500 Cupcakesis now one for two as far as the recipes are concerned. I want to try one or two more before I post of review of the book. I'm hoping the other recipes turn out like this.

Monday, November 06, 2006

Halloween Cupcakes

For Halloween this year, Lorrie and I had decided to do some kind of baking project. We thought about mailing cookies to some friends and what-not and that was the plan when I left to do the shopping. I was walking through Bev's World looking at the chocolate molds and inspiration struck. I grabbed a couple of the Halloween molds that would be perfect for decorations on the top of...cupcakes! Cupcakes are not things I tried before and I thought this would be a great time to try. I thought I could do some vanilla cupcakes and some chocolate. Instead of frosting, we would roll fondant and use a circle cutter and then put the little chocolates on top. So I picked up the necessary supplies and went home to convince Lorrie that this was the way to go. Eventually, she agreed.

First thing I had to do was make the little chocolate bits to put on top of the fondant. I picked up three molds: one mold that were half inch by one inch and said 'BOO' and two molds that had little half inch square cats, witches, ghosts, jack o' lanterns, bats, and skulls. This wasn't that hard. The candy meltsI was using melted easily in squeeze bottles after a couple quick zaps in the microwave. The squeeze bottles let you control how much and where you put the candy so I also reduced the need for scraping. I didn't need the backs to be completely smooth. In fact, I made a point on the backs so it would stick into the fondant and hold its place a little better. The standard color for skulls and ghosts was white, the color for jack o' lanterns and witches (I know weird but it balanced out the number of candies) was orange, and the color for cats and bats was black. To get the black candy I added black candy coloring to dark chocolate melts. For the mold with the word 'BOO' I pretty much stuck to orange and white candy melts. The candies set pretty quick in the fridge since the candies were small and thin. I did try 'painting' the molds a little more this time. With a toothpick and the black candy melts I added eyes to some of the jack o' lanterns and the ghosts and did hats on some of the witches. Still not near perfect, beautifully painted candies but I am slowly getting better at it.

For the cupcakes I chose two recipes from a cookbook I ordered a couple of weeks ago, The King Arthur Flour Baker's Companion: The All-Purpose Baking Cookbook. I like the other King Arthur book I have and it hasn't let me down so I believed these recipes would work. For the plain or vanilla cupcakes I chose the Classic Yellow Cake recipe on page 352. One batch of this recipe yields twenty-four cupcakes. I made two batches of this recipe so we could pick the best ones to use. The first batch didn't rise as much as the second batch but that isn't saying much. These cupcakes didn't rise much beyond the cups I put them in. They tasted good and to me that's the most important thing. The flatness and uniformity of these cupcakes lent themselves to using the fondant but then again maybe I'm just trying to find the positive of their appearance. In any case, they tasted good and looked fine decorated and I'd definitely use this recipe if I needed to do cake rounds for decorating. For the chocolate cupcakes I used the Devil's Food Cake recipe on page 351. This is my favorite of the two cupcake recipes I made. These rose much more in the cups and I probably overfilled them a little but I like the extra top. The flavor was good, a nice chocolate that hung around a little in the aftertaste. I also made two batches of these. Yes, two batches. For those of you not counting along at home, that's ninety-six waiting to be decorated.

Well, not exactly. Like I said we picked through and got rid of ones that didn't look right and so forth. Mainly it was excluding a lot of the first batch of the yellow cake ones but there were a couple of devil's food cake ones that were rejected. Having chosen the best ones, we set about decorating them. The idea was to have two colors, orange and purple, for the cupcakes. These seem to be predominate Halloween colors when we were looking at Halloween decorating ideas. I purchased white fondant and colored it myself. This sounds like it's going to be much more complicated than it really was. The toughest part? The actual mixing of the color into the fondant. The fondant I purchased was in two-and-a-half pound blocks. I worked about a quarter of a block at a time. It has the consistency of clay so working in the coloring was a lot of folding and stretching and recombining until the color was uniform. I alternated between doing orange and doing purple and I didn't really have any issues being consistent in the coloring. All the orange looked the same and all the purple looked the same. I would roll a little out, cut out the circles, and pass them to Lorrie. She secured them to the cupcakes by first brushing the cupcakes with a light coat of corn syrup. Once dry, the corn syrup held the fondant firmly in place. Rolling out the fondant is much like rolling out dough for cutout cookies, you need a well-floured surface and rolling pin but in this case, that flour is actually powered sugar.

Once all the cupcakes had the fondant layer, I gave them a dusting of pearl dust and then placed the candies. Pearl dustis used to give fondant a little shine or sparkle. Using the pearl dust took a little getting used to. A little goes a long way as I learned the hard way. My first couple cupcakes or so had a lot on them and they took a definite silver tinge to them. As with all of these new things I was trying I became better as I went. After all the cupcakes had a coating of pearl dust, Lorrie and I arranged the candies on top. It came out to be three different pieces per cupcake, usually one of each color though there was some variation. After laying out all of the candy on top, I put them in place with a light dab of corn syrup.


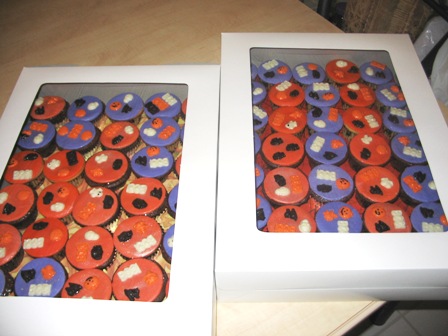
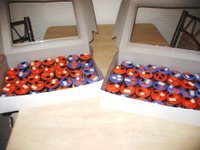
We had some baker's boxes to put them in and lined the bottoms with Halloween themed paper from the scrapbooking section of Michaels. The cupcake liners were Halloween themed until I blew past the seventy-two cupcake mark and then I used some plain ones that had a second aluminum cup (they are actually meant to be baked without a muffin pan, you just put these on a cookie sheet). Lorrie and I each took a box to work the Monday before Halloween.


End result? They looked good and tasted even better. The fondant tasted better the next day. I have to admit I thought it was a little chewing gumish when I first tried it plain but when I had a cupcake the next day it was good. The finished product reminded me a little of a Hostess cupcake in look and feel when I bit into one, but better tasting. I do think this would be a good way of doing a creme filled cupcake, sometime in the future.

Tuesday, October 24, 2006

Pistachio & Apricot Muffins

Lorrie gave me a new book last week called 500 Cupcakes: The Only Cupcake Compendium You'll Ever Need. We saw this at Borders earlier while looking for a cookbook for a gift and thought it was interesting. So Lorrie's mom was visiting us last week but she was leaving Sunday morning. Early Sunday morning, like before the paper even gets there early. I thought it would be nice to make her some muffins to eat on her trip. 500 Cupcakesnot only has cupcake recipes but also muffins (the author considers them a subset of cupcakes. Whatever.) Lorrie likes pistachio nuts so I thought the Pistachio and Apricot Muffin recipe on page 274 might be a good recipe to try.

It wasn't. The recipe calls for 4 cups of self-rising flour, dried apricots (though soaked in brandy and then drained), sugar, and pistachio nuts versus a small amount of butter, buttermilk, and a couple of eggs. Mixing the batter was like mixing paste, very tough. Still I got it to the point where it was just mixed and into the pan. Once baked they were dry, a little heavy, and the flour overpowered the ingredients. Not horrible mind you, they were edible but they weren't the apricoty-pistachio goodness I was hoping for.


That said, I think this can be the basis for a good recipe. I will go through and see if I can improve the recipe. I looked around in the book and this seems to be the only one so far that called for that much flour so I haven't given up on the book.