Showing posts with label cookbook. Show all posts

Thursday, December 13, 2007

Cashew Creme Pear Tart from My Sweet Vegan


This past week I had the pleasure of going through one of the first copies of Hannah Kaminsky's new cookbook My Sweet Vegan and it really is impressive. I knew there would be great recipes in it but what surprised me was how complete of a cookbook it is. This book not only had a large number of different recipes but it is a good information source for cooking vegan (and allergy-free, gluten-free, etc.), especially for someone new to vegan cooking such as myself.

My Sweet Vegan starts with a brief introduction into Hannah's journey into vegan baking and then an overview of some of the special ingredients and tools she uses. I found the ingredient guide helpful because some of the recipes called for ingredients I'd never used or purchased before. It also helped me look at the ingredients from a vegan's perspective. Case in point, margarine. I thought margarine was non-dairy. Not true, brands like Imperial and Land O Lakes contain whey and buttermilk respectively. I only looked based on Hannah's advice.

My Sweet Vegan is broken into five chapters: Sweet Starts, Cookies and Bars, Cakes and Cupcakes, Pies and Tarts, and Miscellaneous Morsals and Desserts. The majority of recipes fall into the Cookies and Bars and Cakes and Cupcakes chapters. Each recipe has a little caption where Hannah talks about the item in the recipe and a large, full-color photo. As far as cookbooks go, I'm more likely to pick a new recipe if there is a picture because either the picture will appeal to me or the picture gives me an idea of how the recipe should turn out. I was also impressed by the large variety of recipes. Some books give you a chapter on something like pies and then give you basically the same pie with different fillings. The recipes presented by My Sweet Vegan varied quite a bit. Old standards like banana nut muffins, black & white cookies, Whoopie pies, and pumpkin pecan pie share the pages with pink lemonade tartlets, root beer float cupcakes, graham flour fig scones, and green tea tiramisu.

My Sweet Vegan ends with a food allergy index and an ingredient index. The food allergy index is a brilliant idea, making it very easy choose a recipe for my food allergy challenged friends without having to go through the ingredients list of each recipe.

The first recipe I tried was the Cashew Creme Pear Tart, which I selected mainly because of the picture. I was able to find almost all of the ingredients in my local supermarket, which isn't very fancy and definitely not the source for hard to find items. The only thing I couldn't find there was the brown rice syrup, hence the use of corn syrup as a substitute. I also made 6 (should have been 7) small tarts out of this recipe instead of one big one. As you can see below, the instructions were straightforward and simple to follow and this tart was a breeze to make, especially if you use the cashew butter like I did. I really like how the pear and the cashew creme tasted together and the crust was very similar to a sugar cookie. This definitely would be a good sweet ending to any meal.

Overall, I really like My Sweet Vegan and even though I'm not vegan, I can see making recipes out of this book for a long time to come.

Monday, October 15, 2007

Teal Perfection!

Paul and I have done cut-outs probably a dozen times now…and this last time was the best technical execution of the basic frosted cut out cookie (i.e. there have been problems in the past – egs. dough too sticky, dough sticks to many surfaces, icing doesn’t dry – to name a few). In fact, on ‘baking day’ I have been known to turn up missing for several hours to avoid any cookie drama. After our first run at Easter cookies with multiple, unplanned designs that had to be perfectly executed, I pawned off our next Baby (cookie) Basket job to my Mother who was visiting from out of town, telling her I couldn’t take the stress of working with Paul again so soon. She recalled my stories of how the bunny eyes (made of Candy Dots) had to be perfectly matched shades of blue and how Paul became upset when one set wasn’t…A look of fear came over her. I think I might have bribed her with something (spa day at HQ?) to assist Paul with this job, as we had three Baby Baskets to make for Mother’s Day. I once asked Paul, “Why does it take all day to make cut outs?” He gave me this reply: Step 1) Roll out dough. Step 2) Cut out cookies. Step 3) Remove good cookies. Step 4) Scrape up bad cookies. Step 5) Repeat Steps 1-4.


HOWEVER, nothing brings me more joy than planning around a theme and delivering a box of cookies that delights on both taste and appearance! One of my hobbies is scrap booking. As such I make use of my squeeze 2x2 die-cutting system as well as shop for the perfect embellishments. I do not get involved in the cookie itself until the actual decoration of the cookie. Although I sometimes advise (strongly) how I want the cookie to look as I did on this occasion. So, Paul and I have different strengths and can compliment each other quite well.


This occasion called for cut outs in the letters “H” and “Q” for the salon I go to for my therapeutic massages and miscellaneous other services: “HQ Headquarters Salon & Spa.” HQ moved into their new upscale location approximately one year ago, which is consequently how I found them, and were celebrating their one-year anniversary; a week long celebration with a different free service to try each day of the week: Hand masks, paraffin dips, facials, polish changes, 10-minute chair massages, and more. Plus treats and more treats. I wanted to bring in something special that represented the theme and the salon atmosphere.

Although I didn’t get the specific PMS (Pantone Match System®) color number for teal that Julie (salon owner) uses in her printed materials (she didn’t have that readily available), we did match to her brochure and business card. Julie uses teal and white as her primary colors.

Trial and error has led us to the Hard Glaze for Cookies from King Arthur Flour Cookie Companion. We poured the frosting into clear bottles, much like what you find at a diner for ketchup or mustard, and each set off to frost our assigned letter. I frosted all of the H’s, Paul the Q’s. I preferred to trench a heavy line of frosting across the entire middle of the cookie, then spread evenly with a small spreading spatula. Paul preferred to use the clear bottle for the entire process; he traced a thick line of frosting over the entire cookie then used the bottle tip to spread the frosting. His cookies had more cookie border showing than did mine. Both methods achieved the objective. We had about eight dozen cookies to frost and sprinkle and we finished in record time; in about one and a half hours! It does seem that the frosting starts to set in a couple of minutes…so one should sprinkle the nonpareils every 4-5 cookies. I let the frosting set overnight, then packed everything up in the morning. I arranged them in stacks of four high, alternating H’s and Q’s in the bakery box.

We used Wilton® Teal icing color for the coloring and added a little at a time until we reached the desired boldness of teal color. The sprinkles are Wilton® White Nonpareils and really popped against the teal. The cookie recipe also comes from King Arthur Flour Cookie Companion. The H’s were flavored with vanilla extract and the Q’s with almond extract.


The packaging was simply a window bakery box with teal scrap booking paper overlaid with a 10” dia. doily. I used a second piece of teal paper to die-cut the letters HQ. I shopped until I found the perfect embellishments, which turned out to be Jolee’s Boutique® ‘My First Haircut.’ This set of stickers contained scissors, a comb, a hair dryer, a salon chair with booster seat and other salon-related tools. I also used parts of three other sticker sets so that everyone at the salon would be represented in their particular specialty; massage, nails, etc.

Julie was thrilled with the cookies, and I was told they were quite the hit with Julie’s clients. This is my first post at Cookies, Et Cetera. I hope you enjoyed reading my first post.

Friday, April 20, 2007

Easter Bunny Cupcakes

If you came to my site on Easter (or scrolled down a bit I guess), you were greeted by a picture of the finished army of these cupcakes. This was the first part of the Easter baskets Lorrie and I created. Originally, I hadn't planned on doing these. As Easter approached I assumed I'd be doing cut-outs again in rabbit and egg shapes. I changed my plans when I decided to try to do some things with less sugar but I still wanted a couple things in the basket that still were pure, unadulterated sugared-up treats.

I used a yellow cake recipe for the cupcake base. Lorrie and my uncle can't have chocolate so that's always in the back of my mind and something I plan for. I've used this recipe before for cupcakes and I know it tastes good. Going forward though I think I will look for something else. This recipe tastes good and is easy enough to make but still it is much more dense than I would prefer. I think I can do better.

I spent a lot of time trying to think of how to decorate these. I had the idea to do an Easter basket theme right away but it was trying to figure out the execution of it that took a while. My first thought was the Peeps chicks, but when I saw the packages and the actual size of each chick, I knew there wouldn't be room for anything else. It had to be the bunnies. I liked the malted milk robin eggs over any of the jelly bean options at the store and they stayed in the theme well as the decorated eggs in the basket. The grass was something I didn't expect to find or use. I used green-dyed coconut last year for the grass and wasn't going to give it a second thought this year until I found this new candy grass right next to the Peeps at Target. Made from potato starch and corn starch, the grass really didn't have much flavor but worked as an alternative to the coconut. Plus, I hate coconut so I was really going to try anything else. I think I spent the longest time brainstorming on how to stick all this on the cupcakes. I didn't want strong flavored frostings and some just don't hold well. In the end, I used marshmallow creme as the frosting. This worked really well. A little dab on the bottom of the Peeps bunny held it in place, for the most part. The marshmallow creme as frosting actually worked very well and was rather easy to put on and spread. Much easier than some of the frostings/glazes I've used in the past. Some did dribble down the sides and it did melt slightly in the sun but really, frosting makes a mess too.


Yellow Cake
from page 352 of the The King Arthur Flour Baker's Companion: The All-Purpose Baking Cookbook

Makes 12 cupcakes

12 Tbls. (1 1/2 sticks) unsalted butter
1 3/4 cups (12 1/4 oz) sugar
3/4 tsp. salt
2 1/2 tsp. baking powder
2 tsp. vanilla extract
4 large eggs plus 2 yolks
2 3/4 cups (11 1/2 oz) unbleached, all-purpose flour
1 1/2 cups milk, buttermilk, or yogurt (I used buttermilk)

Preheat the oven to 350° F.

In a large bowl, cream together the sugar, butter, salt, baking powder, and vanilla until the batter is fluffy. This should take at least five minutes. Also, make sure your butter and eggs are at room temperature. This is a requirement for making a butter cake.

Add the eggs and yolks one at a time. Beat thoroughly before adding the next. Then slowly fold in a third of the flour, then half of the milk, then another third of the flour, the remaining milk, and then the last of the flour. Only stir until mixed. Overmixing will reduce the volume of air trapped in the butter and sugar.

Pour into your greased or paper-lined cake pans or cupcake pans. Cooking times vary by shape but the cupcakes took about twenty-five to thirty minutes and rotate the pan 180° about twelve minutes in. Cool in the pan for about five minutes for cupcakes and ten minutes for a cake and place on a wire rack to cool completely.

Saturday, March 17, 2007

Irish Dairy Bread

St. Pat's Day: Green or Irish

I believe this is the first time I've recognized St. Patrick's Day by baking something instead of drinking something. Previous celebrations took place in various drinking establishments, the best being a little country bar just north of Milwaukee actually owned by an Irishman and not some dork wearing a plastic green hat and calling himself "O'Lucas" all night. But hanging out at Finbar's wasn't about getting drunk. You were there with friends, having a great time, enjoying the atmosphere of real Irish music and food.

Now one of the things you may get during an Irish meal is a couple of pieces of soda bread. This bread is dense but tasty and requires few ingredients and just a little bit of time to make. The leavening is performed by the reaction between buttermilk and baking soda so there's no yeast and no waiting for the dough to rise. I have to admit I was impressed how much this bread rose too. Many muffins use the same buttermilk-baking soda reaction but they don't double in height like this bread did (near the end off baking it came dangerously close to the rack above it).


Irish Dairy Bread
from page 122 of the The King Arthur Flour Baker's Companion: The All-Purpose Baking Cookbook

Makes one 9-inch loaf

4 cups (17 oz) unbleached all-purpose flour
3/4 teaspoon baking soda
1 teaspoon salt
1 tablespoon unsalted butter at room temperature
1 1/2 cups buttermilk

Preheat the oven to 375° F and prepare a baking sheet or cast-iron pot by lightly flouring it.

In a large bowl combine the flour, baking soda, and salt and whisk together thoroughly. Add the butter and distribute the butter evenly through the flour mixture. Create a hole in the center of the flour and pour the buttermilk into it. Stir to combine the ingredients.

Take the dough out of the bowl and knead on a lightly floured surface. Once the dough comes together, form a ball and then press down until it is about 1.5 to 2 inches thick. Cut an "X" into the top and place in the pan. If you are using a cast-iron pot with a lid, put the lid on. Bake in the oven for 35 minutes (for baking sheet) to 40 minutes (for cast-iron pot). Once done, cool on a wire rack. Do not cut until completely cooled.


I've submitted this to Zorra of 1x umrühren bitte and her St. Pat's Day: Green or Irish round-up. I found this blog when I first started reading food blogs, it always has great pictures of bread which I imagine probably taste pretty good too. She also has many of these events, with my favorite, the culinary Advent calender (2005 and 2006).

Thursday, February 08, 2007

Whole Wheat Pizza Crust

A common dinner for Lorrie and myself is a couple of individual pizzas. I'll get a package of flatbreads from the store and a couple of toppings to put on them. Flatbreads on the pan, toppings on the flatbread, oven, bake, pizza. Pretty simple but tastes great. The past couple of weekends I've been creating my own flatbreads for the pizzas. The recipe I'm using is based on a whole wheat pizza recipe in the King Arthur Flour Whole Grain Baking cookbook. Honestly, I could tell you I researched the recipes and chose this one because of so-and-so reason but really I chose the recipe because it didn't use pre-ferments or need to sit overnight. The usual ingredients for our pizzas are garlic, olive oil, spinach (wilted in a hot pan first), sliced tomato, and provolone cheese.


Whole Wheat Pizza Crust
based on the Herbed Whole Wheat Pizza with Mushrooms and Spinach on page 134-136 of the King Arthur Flour Whole Grain Baking: Delicious Recipes Using Nutritious Whole Grains cookbook.

Makes 2 12-inch rounds

3 3/4 cups (15 oz.) white whole wheat flour (I used the King Arthur Organic Whole Wheat)
1 Tbls. + 1 1/2 tsp. instant yeast
1 1/2 cups (12 oz) cool water
1 Tbls. honey
1 Tbls. olive oil
2 tsp. salt
1 Tbls. dried oregano
1 Tbls. dried basil
1/2 tsp. cayenne pepper

In a medium bowl put 2 cups of the flour and all of the yeast. Measure out the water and add to that the honey and stir until it's combined. Add the water-honey mixture to the flour and yeast and mix thoroughly. Cover the bowl with plastic wrap and let sit for an hour.

After the hour, remove the plastic wrap and add in the remaining ingredients and mix. Remove the dough from the bowl and knead on a lightly floured surface for 5 minutes or so. Stop kneading when the dough is shiny and elastic yet soft. Have a baker's bench knife handy to help if the dough sticks because you don't want to over-flour this. Put the dough back into the bowl, cover, and let sit for another 90 minutes. After about 90 minutes the dough should have doubled in size.

Once this second rise is done, turn the dough out onto the lightly floured surface. Divide the dough in half and form each half into a round. Cover these rounds and let them rest for another 20 minutes.

Preheat the oven to 375° F (with a baking stone if that is what you use). Roll each round out to a 12-inch round and put on your pan, baking sheet, or parchment paper. Use a fork to prick the crust all over (if you look at the first picture you will see the dough puffed up; I missed this step the first time through). If you want a traditional end crust, roll up the edges. Bake the crusts individually for 10 minutes and remove from the oven.

At this point you have 2 crusts for use. Use immediately or let cool completely and freeze. When you add your toppings and bake, bake the pizza at 425° F.

Tuesday, January 30, 2007

Almond Honey Caramel Chews

These candies might just be the best thing to ever come out of my kitchen. Better than the sugar almonds. Better than any cookie I've ever made. Heck, better than anything to come off of my grill.

The flavor and texture is incredible. A little crunchy when you first bite into them that dissolves into a wonderful caramel and almond chewy candy with a hint of honey. These are perfect for a party, be it a Super Bowl party or just having friends over.

These are not hard to make, they just take time. The cooking process is slow so there is no worrying about the candy heating or cooling too fast.

Almond Honey Caramel Chews
from page 193 of the The Sweet Life: Desserts from Chanterelleby Kate Zuckerman

Makes about 50 candy pieces

14 oz. (about 4 cups) sliced, blanched almonds
1 cup heavy cream
1 cup whole milk
2 sticks (16 Tbls.) butter
3/4 cup honey
1 1/2 cup sugar
1 Tbls. light corn syrup

Preheat the oven to 350° F. Place the almonds on a baking sheet and bake for 10-15 minutes. They are done when their color is brown and there is a noticeable nutty smell. Take out of the oven and place in a bowl.

Prepare a 12x8 inch pan (or a pan with a similar area) by greasing the pan and placing parchment or aluminum foil on the bottom.

In a heavy bottomed pan with a candy thermometer attached, combine all the ingredients but the almonds and heat over medium-high heat. Make sure the pan can hold four or five times the initial ingredients. I used a 4 qt. pan and it nearly overflowed when it reached the boiling point. Bring the mixture to a boil. Once the color changes to a light golden brown, reduce the heat to medium-low. Continue cooking until the temperature reaches 260° F, stirring about every two minutes. Once it reaches 260° F, remove the pan from the heat.

Fold in the almonds. Pour this mixture into the prepared pan. Bake the candy for 10-12 minutes. It is done when air bubbles appear all over the candy. Remove from the oven and let cool in the pan for at least 4 hours.

Carefully cut the cooled candy into desired shapes.


Also appearing at Sugar Savvy.

A real treat, Kate Zuckerman found my site and left suggestions for variations of these candies! Check out her comment in the comment section and her wonderful site PastryChat. She mentions my attempt at her recipe here. Very cool!

Monday, January 29, 2007

Granola Grabbers

I was looking for a cookie I could bake for a Super Bowl party. I wanted something that was hearty and could hold it's own with the various dips, hors d'œuvres, and brownies. These cookies are perfect. Filled with almonds, peanuts, coconut, and raisins, there's a little something for everyone here.

These are also great as a midnight snack. The cookies are crunchy and chewy at the same time, a combination that just begs to be paired with milk.


Granola Grabbers
from page 82 of the Baking: From My Home to Yours by Dorie Greenspan

Makes about 40 cookies

3 cups granola (no fruit)
3/4 cup raisins
1/2 cup salted peanuts
1/2 cup slivered almonds
1/2 cups sweetened shredded coconut
1/3 cup wheat germ
1 3/4 sticks (14 Tbls.) unsalted butter at room temperature
3/4 cup (packed) light brown sugar
1/4 cup sugar
1 large egg
1/4 teaspoon salt
1 cup all-purpose flour

Preheat the oven to 375° F and prepare 2 baking sheets.

Combine the granola, raisins, peanuts, almonds, coconut, and wheat germ in a bowl and mix well. Set aside for later.

In a mixer beat the butter for 2 minutes at a medium speed. Add the brown sugar and the granulated sugar and cream for 3 minutes or so. Add the salt and the egg and mix thoroughly. Reduce the mixer speed to low. Add the flour and once it is just mixed, add the granola mixture. Stop the mixer once all the granola, nuts, and fruit are just combined. You do not want to over beat this batter. Use a spatula to incorporate any remaining dry ingredients.

Take a heaping tablespoon of the dough and gently pack. Place each cookie about 1 1/2 inch from each other though these won't spread a lot. Flatten them down a tiny bit using your fingertips.

Bake for 10-12 minutes. About halfway through, rotate the pans 180° and switch the pans on the racks. The cookies are done when they are a golden brown but not hard. Remove from the oven, let cool in the pan for a minute or two, then transfer to a wire rack to cool.


Also appearing at Just Baking and featured on the Well Fed Network.

Tuesday, January 16, 2007

Bourbon Bread Pudding

Bread pudding, in some form or another, has probably been around as long as man has been baking bread. Thought to be first made by thrifty cooks as a way to use stale bread, bread pudding may have started from simple and plain roots but over time it has developed into the decadent dessert we know today.

Early recipes often were little more than bread soaked in water or milk and then sweetened and then baked/steamed. As time went on and cooking techniques evolved, ingredients became more readily available, and recipes became more sophisticated, things like butter, cream, eggs, fruit, liquors, etc were added for flavorings. Today's recipes have come a long way from the days of hollowed out bread loaves filled with milk and spices.

Popular in England and the southern United States, it is not uncommon to find bread pudding on a menu as an alternative to chocolate and/or fruit desserts.

I found the recipe below while searching for a dessert for a meal I made last weekend. This slightly sweet bread pudding with the flavors of bourbon and vanilla was the perfect end to a meal of beef tenderloin, pan-seared scallops with pancetta and pomegranate seeds, and grilled asparagus.


Bourbon Bread Pudding
from page 407 of the Baking: From My Home to Yoursby Dorie Greenspan

Makes about 8 servings

8 oz. baguette or egg-based bread, preferably stale
1 1/2 cups whole milk
1 1/2 cups heavy cream
4 large eggs
2 large egg yolks
1/2 cup sugar
1/2 tsp. ground cinnamon
dash of freshly grated nutmeg
1 Tbls. bourbon
1 1/2 tsp. pure vanilla extract
1/8 tsp. pure almond extract

Boil a pot of water and turn off the heat once it starts boiling. While the water is coming to a boil, cube the bread into 1-inch pieces. If the bread is not stale, spread it in a single layer on a baking sheet and bake in a 350° F oven for 10 minutes. Put the stale bread cubes in a glass or ceramic 9-by-5 inch loaf pan.

In a heavy bottomed pan, heat the milk and cream just to the point where they start boiling and then turn the heat off. While they are boiling, mix the eggs, yolks, sugar, and cinnamon in a bowl. Once the milk and cream mixture is ready, start adding it a little at a time while whisking. This will temper the eggs; add the milk and cream too fast and the eggs could curdle. It is important to keep whisking while slowly adding the remaining milk. Now add in the bourbon, vanilla, and almond extract. If you are a fan of Justin Wilson and are so inclined, go ahead and check the bourbon to be sure it's fine. Once blended, gently tap the bowl on the counter to remove any air bubbles and then pour the custard mixture over the bread. Using the back of a spoon, gently press the bread cubes down in the pan, allowing the custard to completely cover the cubes. Cover with some wax paper and let the bread soak for about an hour, making sure to press the bread down occasionally.

Preheat the oven to 350° F. Place a couple of paper towels in a roasting pan large enough to hold the loaf pan. Remove the wax paper and cover the loaf pan with aluminum foil. Poke a couple of holes in foil. Put the pan of bread pudding in the roasting pan and place in the center rack of the oven. Add the water you boiled previously until it comes halfway up the sides of the loaf pan. Bake for 30 minutes and then remove the foil and bake for another 15 minutes. The pudding is done when it is puffed up, golden, and a cake tester or similar item can be inserted deeply into the middle and be removed cleanly. Remove from the water bath and let it cool on a rack. Serve warm or at least at room temperature. Store leftovers tightly covered in the refrigerator for a day. Bring back to room temperature to serve.

The whip cream in the picture was made from whipping a cup of cold heavy whipping cream by hand and when peaks form, add about 3 Tbls. powdered sugar and 2 tsp. of the bourbon. It is slightly sweet but highlights the flavor of the bourbon in the pudding.


Also appearing at Just Baking and featured on the Well Fed Network.

Sources:
Baking: From My Home to Yoursby Dorie Greenspan
Food Timeline-- history notes: puddings

Monday, January 15, 2007

Pistachio & Apricot Muffins, Again

You can see the other two posts in this "series" here.

When I started the second batch of these muffins, I thought I would do a series. Each month, I would try changing a single ingredient, hopefully different results each time. Maybe good, but more importantly, show how changing one ingredient affects things. My own little kitchen laboratory! These muffins were perfect as a test subject. The first batch was not so good but it had potential. The flavors were there but they were trapped in a cast of flour. I couldn't help thinking, you had these flavors to work with and yet this is the recipe you published?

Last time, I sweetened the muffins with honey instead of sugar. This month the plan was to just reduce the flour. But I stopped to think about all the other things I want to do and I asked myself, do I want to make a batch of these muffins every month?

No, I do not.

So my plan changed. I did more than just reduce the flour. I added baking powder to provide more lift. I don't think the self-rising flour was doing a good job on its own. A couple people who tried the previous batch of muffins said they couldn't really taste the pistachios. Well, the honey was partly to blame for that but still I ground some pistachios and added that to the flour so there is a slight hint of pistachio throughout without turning these into mini-nutbreads. I kept the brandy in and it was much easier making the apricot puree this way. The glaze adds some shine and a touch of sweetness.

OK, this time I think I've got it. I like how these turned out. Still not light as air but definitely not the hard flour biscuits they were before. You can taste the pistachio throughout and it was the apricot supplying the sweetness this time. The chopped pistachios gave it a little tooth also. This is a good recipe to end this "series" on.


Pistachio & Apricot Muffins
even more remotely based on the Pistachio & Apricot recipe on page 274 of the 500 Cupcakes: The Only Cupcake Compendium You'll Ever Need by Fergal Connolly.

Makes 12 regular sized muffins

1 1/3 cups (8 oz) + enough for decorating dried apricots
4 tbsp. brandy
3 cups (12 3/4 oz) self-rising flour
1/2 cup (1 stick) unsalted butter, cut into small cubes
3/4 cup sugar
2 eggs
3/4 cup buttermilk
1/2 tsp. baking powder
1/2 cup (3 1/2 oz) + 1 oz. + enough for decorating shelled pistachios
3 Tbsp. honey
1 Tbsp. water

Give the apricots a rough chop and soak them in the brandy for about a hour. Preheat the oven to 350° F. Using a food processor, grind the 1 oz. of pistachios into a meal, as fine as you can get it. In a medium sized bowl, whisk the ground pistachios, flour, and baking powder together. Place the apricots and the brandy in a food processor and puree them until smooth. In another bowl, beat the eggs slightly to break up the yolks. Add the sugar, buttermilk, and the apricots and mix them together. Cut the butter into the flour mixture until it resembles breadcrumbs. Combine all the ingredients into the bowl with the flour and butter and stir until everything is just combined. Spoon the mixture evenly into baking cups. I use a 1/4 cup ice cream scoop to measure and place the batter in the cups. Decorate with a bit of apricot and some pistachios. Bake for 25 minutes, checking after about 20 minutes. These are done when a cake tester or toothpick comes out cleanly. Let sit in the pan for 5 minutes and then cool on a wire rack. While they are cooling, mix the honey and water and warm a bit to make it easier to combine. Brush a light coating of the glaze onto the muffins.


OK, all said and done, if I do make these again I would probably swap out the buttermilk for a full cup of whole milk. Oh, and I also started thinking the dryness comes not only from the amount of flour but dried apricots soaking up liquids which hindsight being 20/20, I should have thought of sooner. All right, I'll stop.

Thursday, December 28, 2006

Lebkuchen

Lebkuchen is a form of gingerbread common in Germany. The difference between Lebkuchen and what we Americans typically think of gingerbread is it's made with honey instead of molasses, hence the lighter color. Lebkuchen was developed in the 13th century by Franconian monks though the development of the name Lebkuchen is still a mystery. The most likely explanation is it comes from the Latin word for a flat, unleavened loaf, libum. However the more popular (and less academic) belief is the name comes from the German word Leben, which means life. In fact, it is believed that eating these "life cakes" can chase away the winter blues.

The city most famous for its Lebkuchen is Nuremberg. Located on a major spice route, records show Lebkuchen was baked in Nuremberg since the late 14th century. Nuremberg Lebkuchen is a protected food product in Europe and its production is strictly controlled. The highest quality Lebkuchen of Nuremberg is given the title Elisen, supposedly named after a daughter of a Nuremberg baker.

This particular recipe uses crystallized ginger instead of the more common candied fruit. This change causes the spicy flavor of ginger to be strong in these bars. The bars themselves are dense but soft. The bars do rise slightly while baking but they will basically be the thickness you roll them out to be. If you try to roll them out thin like a sugar cookie I believe you would get a hard, dense cookie that might be tough to chew. The dough is sticky, very sticky. It was probably the toughest cookie/bar/etc. dough I've worked with yet. And there is the time factor. The dough must chill overnight in this recipe (and many others). I recommend that when chilling the dough, gently work it into a ball shape so only a small portion of the dough touches the bowl. It will be much, much easier to remove from the bowl the next day. Still, the rewards of this delicious bar outweighed the work involved.


Lebkuchen
from page 198 of the The King Arthur Flour Cookie Companion: The Essential Cookie Cookbook

Makes about 24 bars

3/4 cup (9 oz) honey
1/2 cup (4 oz) light brown sugar
1 large egg
2 tsp chopped lemon zest or 1/4 tsp lemon oil
2 tsp chopped orange zest or 1/4 tsp orange oil
2 1/4 cups (9 1/2 oz) unbleached all-purpose flour
1/4 tsp baking soda
1/2 cups (2 oz) finely chopped blanched almonds
2 tsp cinnamon
1 tsp ground ginger
1 tsp ground nutmeg
1 tsp ground cloves
3 rounded Tbls (1 3/4 oz) diced crystallized ginger
6 Tbls brandy
1 cup (4 oz) powdered sugar

Combine the honey and the brown sugar in a saucepan and bring to a boil while stirring occasionally. Once boiling, remove from heat and let it cool until it's only slightly warm. Using a food processor, chop the crystallized ginger until it is fine. Mix the honey-brown sugar mixture, egg, lemon zest or oil, and orange zest or oil in a large bowl until they are well mixed. Add in the spices, flour, crystallized ginger, baking soda, and almonds and mix until they are thoroughly mixed. This produces a stiff and very sticky dough. Very sticky. Cover the bowl, put in the refrigerator, and let sit overnight.

When you are ready the next day, preheat the oven to 350° F and grease a 9x13 inch or equivalent sized pan. Remove the dough from the refrigerator and place on a lightly floured surface. Roll out the dough to fit into the pan. The dough will be very sticky but try not to over-flour everything. Put the dough in the pan. I rolled it onto the rolling pin and then unrolled it in the pan. Fit the dough into the pan the best you can but don't press down too hard. I greased my fingers and that worked pretty well. Bake for about 20 to 22 minutes. In the meantime, mix the brandy and the powdered sugar. This glaze isn't very thick. The bars are down when a cake tester or toothpick comes out clean. Transfer to a cooling rack immediately and begin glazing. Apply the glaze in layers so each layer has time to soak in and harden. Once fully glazed and cooled, cut into 1x2 inch bars. If you store these in an airtight container with a slice of apple, they will stay soft.


Also on Just Baking.

Sources:
Lebkuchen at Wikipedia
German Embassy in Washington DC
Nuremberg Gingerbread Tour
The King Arthur Flour Cookie Companion: The Essential Cookie Cookbook
Germany's Regional Recipes
German Cookery: The Crown Classic Cookbook Series (Crown Classic Cookbook)
The German Cookbook: A Complete Guide to Mastering Authentic German Cooking

Thursday, December 21, 2006

My second set of bars

I needed another batch of bars for the reception after my grandmother's funeral and the rule for no chocolate was still in effect. I had planned on trying a recipe for Lebkuchen at sometime during the holiday season and thought this would be a good time to make it. The only book I had with me was the King Arthur Flour Cookie Companion, which in this case wouldn't have been my first choice. There's nothing wrong with this book, quite the contrary, but when I originally thought about baking Lebkuchen I had chose the recipe in Mimi Sheraton's wonderful book The German Cookbook: A Complete Guide to Mastering Authentic German Cooking.

I wrote more information about Lebkuchen and the recipe I used is in this post here.

Monday, December 18, 2006

Chewy Date-Nut Bars

I decided to help my mother and my aunt out by making some bars for the reception after my grandmother's funeral. When I volunteered I didn't have any set plans or recipes in mind so I started paging through the bar cookie section of the King Arthur Flour Cookie Companion,trying see what jumped out at me. I have to admit, this is my favorite book. Every recipe I've tried worked the first time and tasted great. The variety of recipes means I have recipes for just about any occasion. In fact, when I first started baking again over a year ago, this was the first book I bought and have used consistently since.

While paging through the different recipes, I only had one guideline in mind: no chocolate. I wanted something that everyone could try and Lorrie and my uncle Joel don't eat chocolate. It was a good thing I had this rule too. These were one of the few non-chocolate choices at the reception. Other people had brought a lot of things that contained chocolate. This date bar caught my attention because the description talked of yellowed recipes and of days past. 'Historic' or 'back in the olden days' anything will always make me stop and look.

Now, my dad likes date bars a lot. My aunt Nancy makes date bars he absolutely loves. Her bars have a very strong date flavor (duh, hence the name) which is not the rest of the family's cup o' tea. These bars had a more subtle date flavor and received a thumbs up from every member of the family and many of Lorrie's coworkers. I really thought these bars were good. They were moist and chewy with a little sweetness and a little flavor of date while the walnuts provided a little tooth when you bit into the bars. I will make these again.

Chewy Date-Nut Bars
from page 195 of the The King Arthur Flour Cookie Companion: The Essential Cookie Cookbook

Makes about 16 bars

2 large eggs
1 1/4 cups (5 1/4 oz) unbleached all-purpose flour
1/4 teaspoon salt
1 teaspoon baking powder
1 cup (8 oz) brown sugar (I used dark)
1 cup (4 oz) chopped walnuts
1 cup (5 1/4 oz) chopped dates
Powdered sugar for dusting

Preheat the oven to 400° F. In a mixing bowl large enough to hold all the ingredients, beat the eggs until frothy. In a different bowl, add the flour, salt, baking powder, and brown sugar and whisk together until they are sufficiently mixed. Add these dry ingredients to the eggs and stir until mixed. Fold in the dates and walnuts. Grease a 9x9 inch pan. Put the batter into the pan and spread evenly. I recommend using your fingers. Make sure they are well greased because this batter is very sticky. Bake the bars for 18 to 22 minutes. They are done when they are golden brown and the top of the bars is shiny. Since we want chewy bars, not crunchy, the center should be slightly wet when a toothpick or tester is inserted into the middle. Overbaking will dry these bars out making them crunchy. Cool them completely before cutting. Dust the tops with powdered sugar.

Wednesday, December 06, 2006

Sugar Almonds

While doing research for an article about Stollen for Just Baking, I ran across a recipe for sugar almonds that piqued my curiosity. I was intrigued by the simple list of ingredients and the method used to create a hard candy shell, so I gave it a try. The results were surprisingly excellent. The candy coating gave the almonds a good crunch when you bit into them. The flavors of the sugar, cinnamon, and almonds were well balanced. No flavor overpowered another. The small amount of cinnamon was noticeable and highlighted the sweetness of the sugar. These almonds would be popular served at a party or on a dessert tray. They would also make a wonderful gift from your kitchen, in a decorated jar or container.

The key to the recipe is not overcooking the almonds, a lesson I learned the hard way. While preparing a batch I was paged for work and ended up overcooking the almonds because of the distraction. Although the shell still formed and had the desired crunchiness, the flavor and texture of slightly burnt almonds made them unpleasant to eat. I also made batches in different size pans (two and four quart) and found that the bigger pan made it easier to keep the almonds separate at the end.

The recipe is from German Cookery: The Crown Classic Cookbook Series (Crown Classic Cookbook). It’s recipe number 494 (page 199), which is in the candies section of the chapter entitled “Christmas Cakes and Candies”.

Sugar Almonds
4 Tbls. water
3/4 cup granulated sugar
3/4 cup shelled almonds (do not use blanched)
1/4 tsp. cinnamon

Grease a jelly roll or similar pan and place two forks by it. Combine water and sugar in a heavy bottomed sauce pan and heat until this forms a thick syrup. The water will boil off. When the syrup is ready, remove it from heat, gently add in the almonds, and stir constantly. Continue to stir until the sugar syrup begins to crackle, which does not take long and occurs while the syrup is still liquid. Place this over heat again. The sugar will crystallize and form a white grainy coating; continue heating and stirring until all the sugar is melted again. Once all the sugar is melted, mix in the cinnamon. Remove from heat and pour onto greased pan. Separate the almonds with the forks, working quickly before they cool and fuse together.


As posted at Sugar Savvy or as one of the featured articles at Well Fed...

Sources for Sugar Almonds:

Tuesday, December 05, 2006

My first post at Just Baking

Stollen is a traditional German fruitcake made to celebrate the Christmas season. Although many recipes exist, the most famous is the Dresden Stollen ("Dresdner Weihnachtsstollen" in German). The city of Dresden is also where Stollen was first created in the 15th century and sold at the Striezelmarkt Christmas market. Originally called Striezel, the once folded over shape of the Stollen was meant to represent the baby Jesus in swaddling clothes. Later miners renamed it because they thought it looked like the opening to a mine or Stollen.

Continue reading at Just Baking...


Sources for Stollen:
Interesting fact I couldn't fit into the article: Martin Luther refers to "butter-letters" in his writings at the start of the Protestant Reformation so the desire to improve the taste of Stollen actually had a tiny part in the Saxony's change from Catholicism to Protestantism.

Stollen

Stollen is a traditional German fruitcake made to celebrate the Christmas season. Although many recipes exist, the most famous is the Dresden Stollen (”Dresdner Weihnachtsstollen” in German). The city of Dresden is also where Stollen was first created in the 15th century and sold at the Striezelmarkt Christmas market. Originally called Striezel, the once folded over shape of the Stollen was meant to represent the baby Jesus in swaddling clothes. Later miners renamed it because they thought it looked like the opening to a mine or Stollen.

The original recipe for Stollen contained no dairy products. Historically, the Advent season was a time for fasting and things like milk and butter were not allowed. So the original Stollen was hard and relatively tasteless. In 1674 Prince Elector Ernst and his brother Duke Albrecht petitioned the Pope to allow their bakers to use butter. The Pope granted them a “butter-letter” which allowed only them the use of dairy during the fasting period. A few years later other bakers were also allowed to use butter but they had to pay a fine. The fines for using butter stopped when Saxony became Protestant.

Every year in Dresden they hold the Dresden Stollen Festival. It occurs on the Saturday before the 2nd Sunday of Advent, which is December 9th this year. Over 700,000 people take part in a day which includes a parade and the ceremonial cutting of the 3 to 4 ton giant Stollen by the Royal Master Baker and the Stollen Maiden. Pieces of the giant Stollen are sold to guests with part of the money generated going to charity.

The recipe below is from Mimi Sheraton’s wonderful cookbook The German Cookbook: A Complete Guide to Mastering Authentic German Cooking. It is on pages 450-451 and is bookended by two other recipes for Christmas breads. While researching the history of Stollen, I also found this was the recipe promoted by the German Embassy in Canada.

Stollen

Makes 3 loaves

1-1/2 cups raisins
1 cup chopped citron
1 cup chopped candied orange peel
1/2 cup rum
6 to 8 slivered blanched bitter almonds or 1 teaspoon almond extract
2 envelopes dried powdered yeast
1/2 cup luke-warm water
1 tablespoon sugar (optional - used to activate the yeast quickly)
2 cups milk
1 cup sugar
2 teaspoons salt
1-1/3 cups butter
1 lemon rind, grated
2 tbs. rum
2 cups flour
4 eggs, lightly beaten
5 to 7 cups flour
1-1/2 cups chopped blanched almonds
melted butter
granulated sugar
confectioner’s sugar (vanilla flavored is preferred)

Soak the raisins, citron, and orange peel in rum for about an hour and then drain but save the rum. Follow the directions on the package to activate the yeast in warm water. Scald the milk and add the sugar, salt, and butter. After the butter has melted, add to the mixture the rum, lemon peel, and almond extract if you are not using bitter almonds. Let the mixture cool until it is lukewarm in temperature. Add the yeast mixture to this as well as 2 cups of flour. Mix thoroughly and let it sit in a warm area with no draft until the dough blisters (about 15-30 minutes). When the dough is ready, lightly beat the eggs and add them in. Slowly mix in the additional 5-7 cups of flour until the dough is not sticky, but soft and light and smooth enough to handle.

Dry the soaked fruit and lightly dredge it with flour. Place the dough onto a thoroughly floured board to knead. While kneading, add in the fruit, almonds, and bitter almonds if you are not using the almond extract. Continue kneading until the dough is smooth and elastic and blisters. Form a ball and put in a floured bowl. Brush the dough with melted butter, cover with a thin towel, and place in a warm, draft-less area to rise for about an hour. The dough should double in bulk. Punch the dough down and divide into three smaller balls.

Let the dough rest for 10 minutes and then roll each ball into an oval about 3/4 of an inch thick. Brush the tops with melted butter and sprinkle a small amount of sugar over them. Fold each oval in half length-ways so the edge of the top half doesn’t quite meet the edge of the bottom half. Place all three loaves on a buttered baking sheet and again brush with melted butter. Allow the loaves to rise in a draft-free, warm area until they double in bulk again (about 1 hour).

Preheat your oven to 425° F. First bake the loaves for 10 minutes and then turn the heat down to 350° F. Bake the loaves for roughly 45 minutes. The loaves are done when they are golden brown. Remove from the oven and place on a cooling rack. While still warm, brush the loaves with melted butter and generously sprinkle the confectioner’s sugar over them. The confectioner’s sugar should cover the top of the loaves like an icing.

Stollen is served in 1/4 inch to 1/2 inch slices and sprinkled with additional confectioner’s sugar. It does store well in a cool place (not in the refrigerator).

As posted at Just Baking.

The photo used was taken from the Flickr account of Rene Schwietzke and used under the Creative Commons Attribution 2.0 license.

Tuesday, November 28, 2006

My Thanksgiving

I had the pleasure of spending Thanksgiving this year not in the cold climate of Wisconsin or Michigan but instead in bright and sunny Florida! With their temperatures in the 50's - same as here. Yay. Anyway my sister had moved there back in March and my family went down to visit her. We were also celebrating my dad's 60th birthday. We actually had our Thanksgiving dinner on Wednesday and then spent the day at Epcot in Walt Disney World. on Thursday. Dinner was good and Epcot was a blast My favorite thing was the World Showcase, specifically Norway, Germany, and the United Kingdom. Even did a little shopping and picked up some new cookbooks. They are Norwegian Touches: History, Recipes, Folk Arts Notably Norwegian;Germany's Regional Recipes;and German Cookery: The Crown Classic Cookbook Series (Crown Classic Cookbook).The Norwegian cookbook appealed to me because a lot of the recipes were about cookies and other baked goods. The other selling point is each recipe is introduced by a short paragraph on who submitted the recipe and a little background on the recipe itself. It may discuss a particular tradition or what the recipe means to that person. I picked up the two German cookbooks because I like the recipes. Most of my ancestors were German and I would like to try cooking some of the recipes as they should be made and not reinterpreted for the American public (stollen comes to mind as an example of this trend). It would also be interesting to see how some of my family's recipes differ from the recipes in these books. Plus I like books so they made nice souvenirs.

But unfortunately all this fun has been followed by a downside. Somewhere along the way I picked up a cold. There's probably a connection between my cold and hurtling through the air in a metal tube filled with kids of various ages for a couple of hours but I'm digressing. So there won't be much cooking and baking for me until I feel better. Especially in the case of recipes. I prefer to try a recipe first and have people taste-test it before I post about it, good or bad. They may pick-up on things I don't and vice versa. Plus anything I taste right now has the subtle hint of the Walgreen's NyQuil knock-off to it.

Monday, November 20, 2006

Pistachio & Apricot Muffins, Take Two

Last month I tried a recipe for pistachio & apricot muffins that I didn't like. It was heavy on the flour and the muffins were dry. I liked the combo of pistachios and apricots so I vowed to try again. This past weekend I did.

Rather than go all nuts swapping out ingredients and changing quantities right away, I decided to change the recipe slightly. Instead of superfine sugar, I used honey. I did this to add sweetness but more importantly, moisture. The first batch was very dry and hard to mix together. This batch was still a little sticky but was much easier to fold the ingredients. So here is the changed recipe.

Pistachio & Apricot Muffins
based on the Pistachio & Apricot recipe on page 274 of the 500 Cupcakes: The Only Cupcake Compendium You'll Ever Need by Fergal Connolly.

Makes 16 regular sized muffins

1 1/3 cups (8 oz) dried apricots
4 tbsp. brandy
4 cups (17 oz) self-rising flour
1/2 cup (1 stick) unsalted butter, cut into small cubes
3/4 cup honey
2 eggs
3/4 cup buttermilk
1/4 teas. + a pinch baking soda
1/2 cup (3 1/2 oz) shelled pistachios

Give the apricots a rough chop and soak them in the brandy for about a hour. Preheat the oven to 325° F. Remove the apricots from the brandy and puree them in a food processor until smooth. Some small chunks of apricot is fine. In a medium sized bowl, cut the butter into the flour until it resembles breadcrumbs and then dust with the additional baking soda. In another bowl, beat the eggs slightly to break up the yolks. Add the honey, buttermilk, and the apricots and mix them together. Combine all the ingredients into the bowl with the flour and butter and stir until everything is just combined. Spoon the mixture evenly into baking cups. I use a 1/4 cup ice cream scoop to measure and place the batter in the cups. Bake for 20-25 minutes, checking after about eighteen minutes. These are done when a cake tester or toothpick comes out cleanly.

These turned out better. The muffins rose more while baking and weren't so dense. Still, they are not light and fluffy. You could taste the apricots and honey but it still had a slight flour taste. These were also sweeter than the previous batch. The taste does improve with age. Lorrie mentioned the picture looks like a jalapeno corn muffin and while that definitely doesn't describe the flavor, that observation is spot-on to the feel and texture of this muffin.

But I think I can do better, maybe next time I'll try reducing the flour. Check back after the holiday season for the next episode of what is now becoming a regular series, Pistachio & Apricot Muffins.

Also, I know the name is Cookies, Et Cetera so you'd think there would be more cookies on this site. Well, all I can say is they're coming. I may have been focusing on the 'et cetera' part for a little bit but in December I will definitely be baking more cookie recipes and sharing them here.

Thursday, November 09, 2006

Pumpkin Muffins

This past Sunday I tried a second recipe from the latest book in my collection, 500 Cupcakes: The Only Cupcake Compendium You'll Ever Need. I was not thrilled with how the Pistachio & Apricot Muffins turned out and when I needed to make my Halloween cupcakes I went elsewhere for recipes I trusted more. However, I don't want to condemn a book from one bad recipe and other recipes that seemed very different than recipes from other books so I made a batch of cupcakes using a different recipe. I'm glad I did. This time things turned out much better.

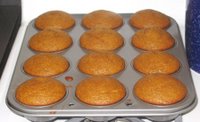
Pumpkins are everywhere this time of year so I tried the Halloween Pumpkin Muffins from page 198 of 500 Cupcakes. Unlike the last muffin recipe I tried from this book, the dry ingredients to wet ingredients ratio was more on par with what I expected. A major difference this time was the amount of flour was less than half the Pistachio & Apricot Muffins. Also, no butter. This recipe called for vegetable oil. Flavoring was pumpkin puree, cinnamon, and allspice. I used canned pumpkin and I don't regret it one bit. I made my own fresh pumpkin last year and it was fine and all but a lot more work (I roasted) for results that were a little better. Not to say I wouldn't do it again, especially if I was making a soup or something and wanted to use the pumpkin halves as bowls or if I got a really good deal on pumpkin. It's just in my opinion the canned pumpkin is pretty good for something coming in a metal container. But I'm digressing. I combined the dry ingredients and the wet separately and then folded the dry in until they were just mixed.

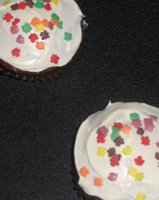
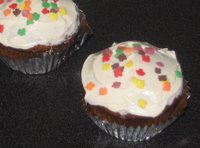
Now here's where the book got a little screwy. The recipe says this makes 6 large muffins. When I hear large muffins, I think of ones bigger than my fist, six to a pan large. The muffins you get at a coffee shoppe and you need both hands to carry the plate kind of big. The intro caption for this recipe says "Decorate these cupcakes with skeletons for when the trick-or-treaters come calling." I'm reading the recipe thinking, yeah, these trick-or-treaters are going to work themselves into a frenzy when I pop open the door and reward their shy/enthusiastic "Trick-or-treat!" with a frosted muffin the size of their head! But that's not the picture the book gives me to use as a guide. The picture given with the recipe shows what I consider a standard size, twelve to a pan size. Reality is there is enough batter to make six large or twelve regular muffins but still a little weird. These really were good looking muffins coming out of the oven. The book has these cupcakes with cut-out fondant but I didn't want to do that, I was planning on using a cream cheese frosting. I didn't have a chance to make a homemade frosting for these so I just used one of the store bought whipped varieties. To top them off, little candy sprinkles shaped and colored like autumn leaves.

I liked these muffins. They were moist and tasted wonderful. The cream cheese frosting was a good choice flavorwise. The pumpkin flavor of the muffin was strong and matched well with the frosting. The candy sprinkles not only added color but a little crunch too when you bit into them. I know these went fast when Lorrie took them to work. I would definitely recommend this recipe.

OK, 500 Cupcakesis now one for two as far as the recipes are concerned. I want to try one or two more before I post of review of the book. I'm hoping the other recipes turn out like this.